Friday 18 November 2022

Lili Of The Valley - Oh So Mice #2

Afternoon Friends

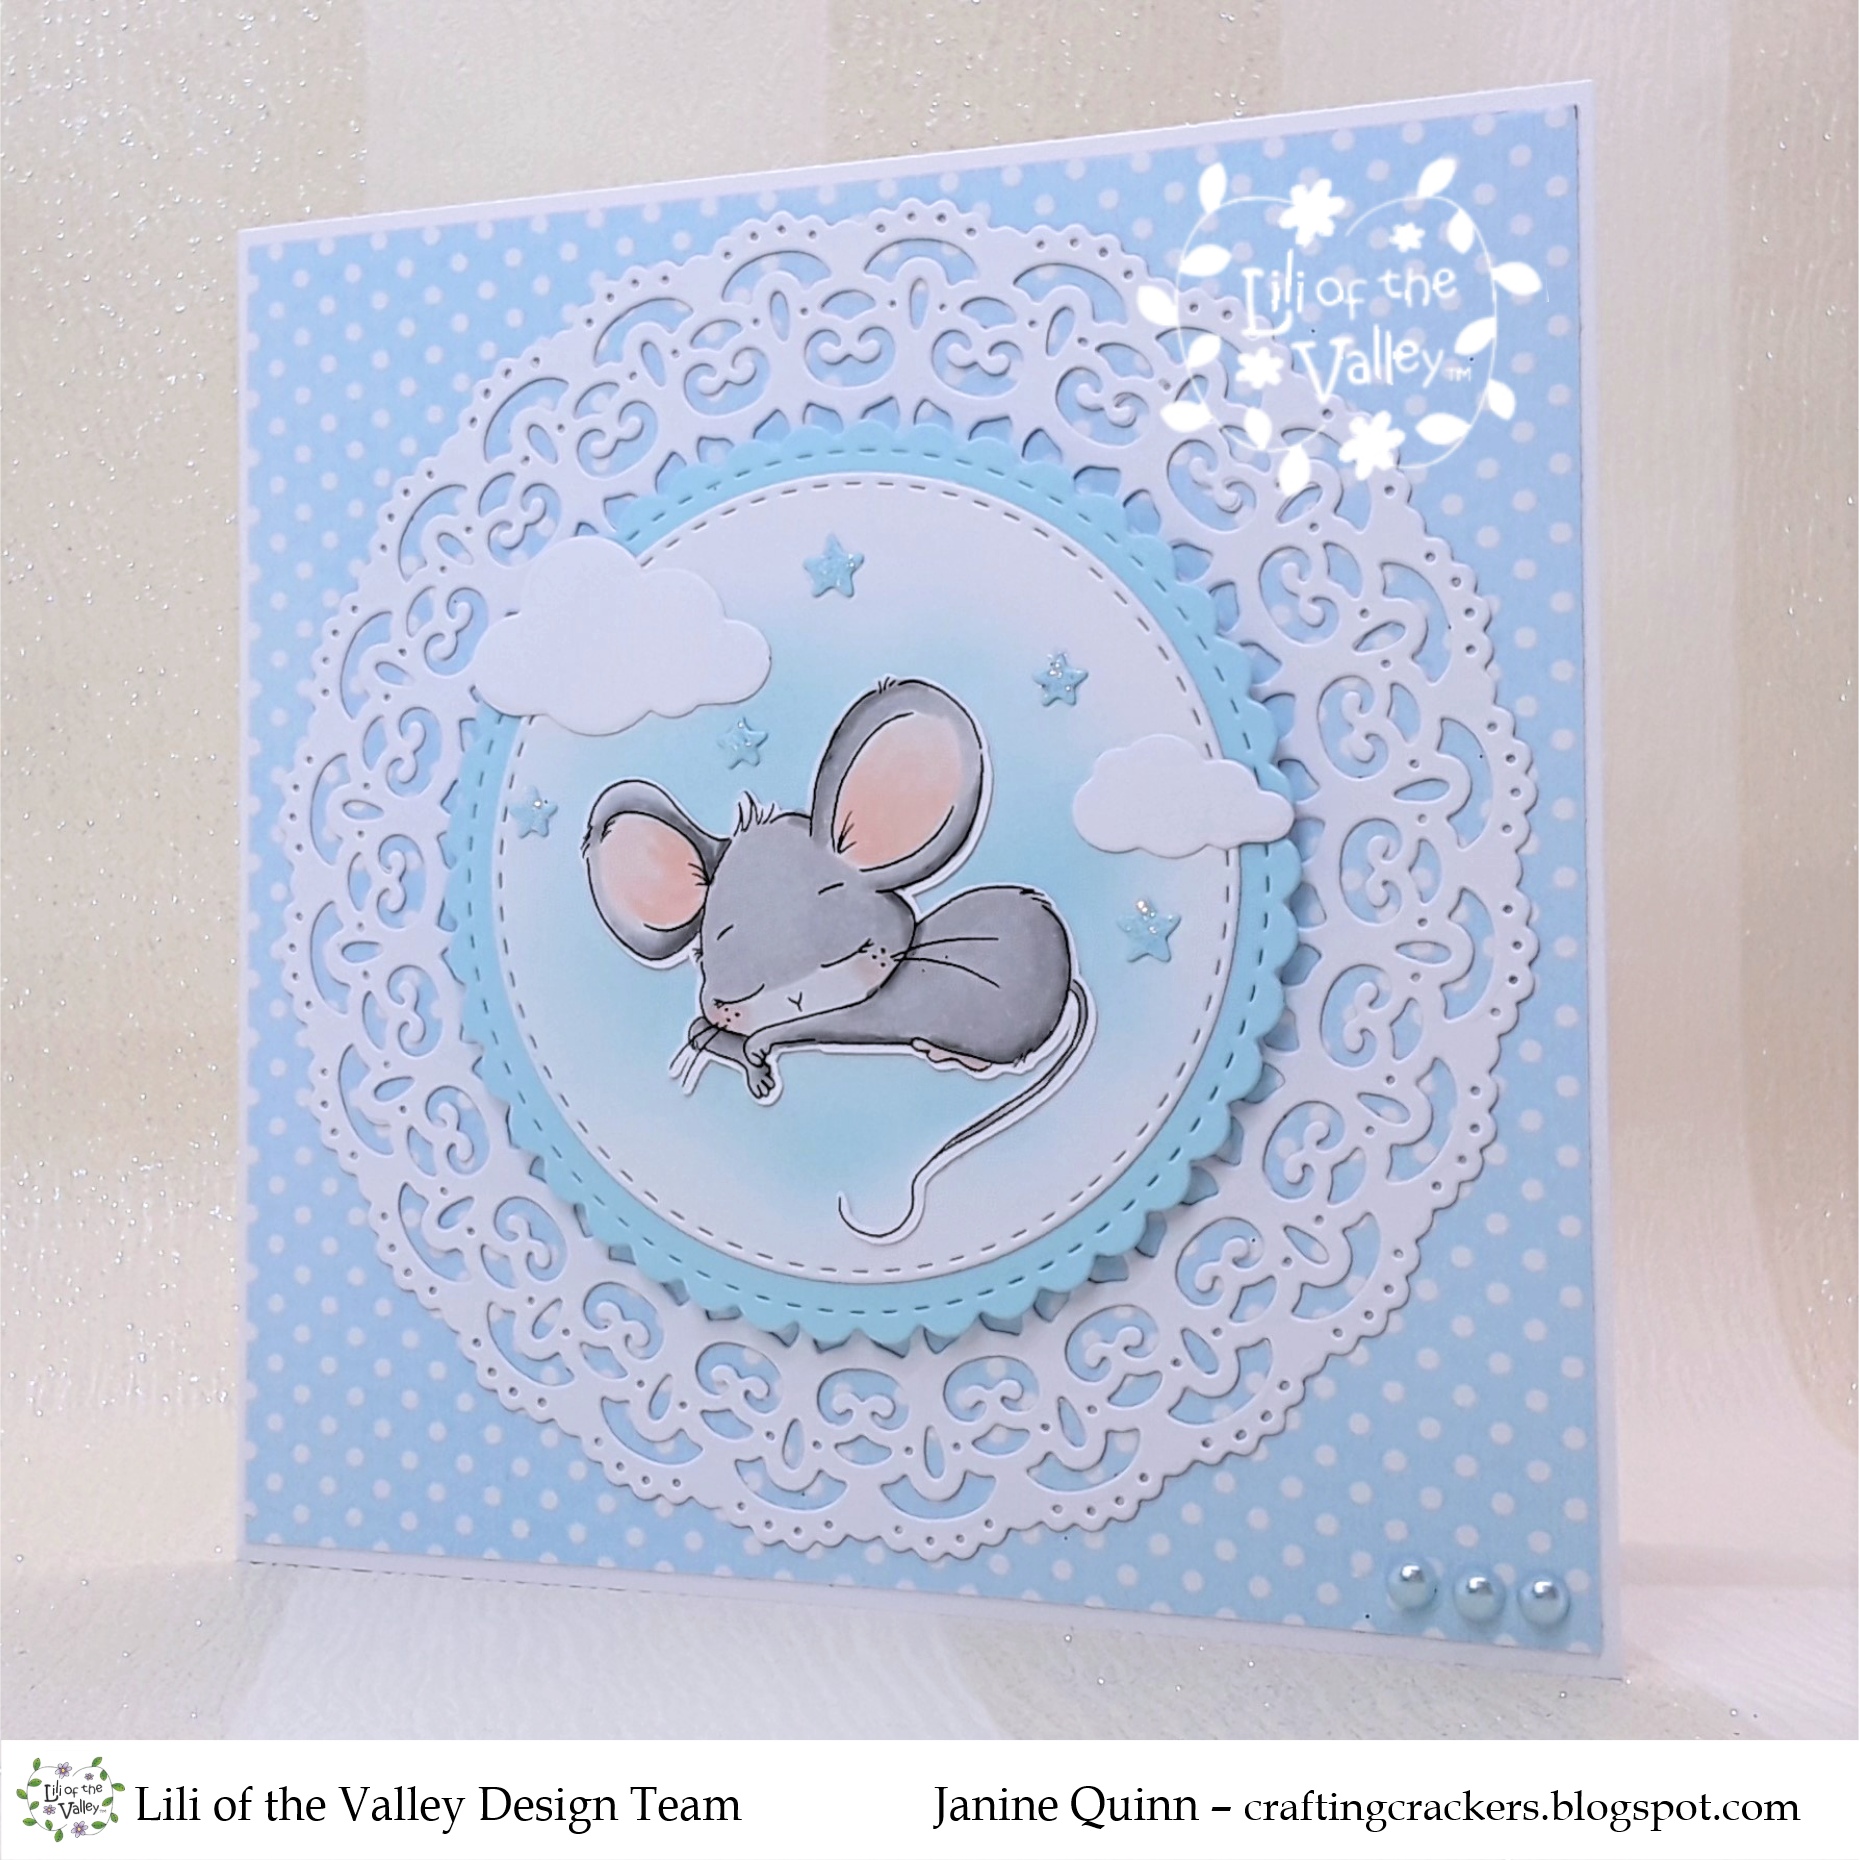
Today I'm sharing the last of my cards using the new October release from Lili Of The Valley. The new collection included a mice, cats and dogs set which are now available in their Etsy store (see links on each of my recent posts) as well as Create and Craft.com. 

For my card today I used the 'Oh So Mice' stamp set, my card could easily be used for many different occasions eg birthday, baby, baby shower or simply to say hi.
 
For your information, here is the link to the LOTV Etsy Store to check out all the stampsand the LOTV online store to check out the rest of their goodies.


Here's What I Did & Used
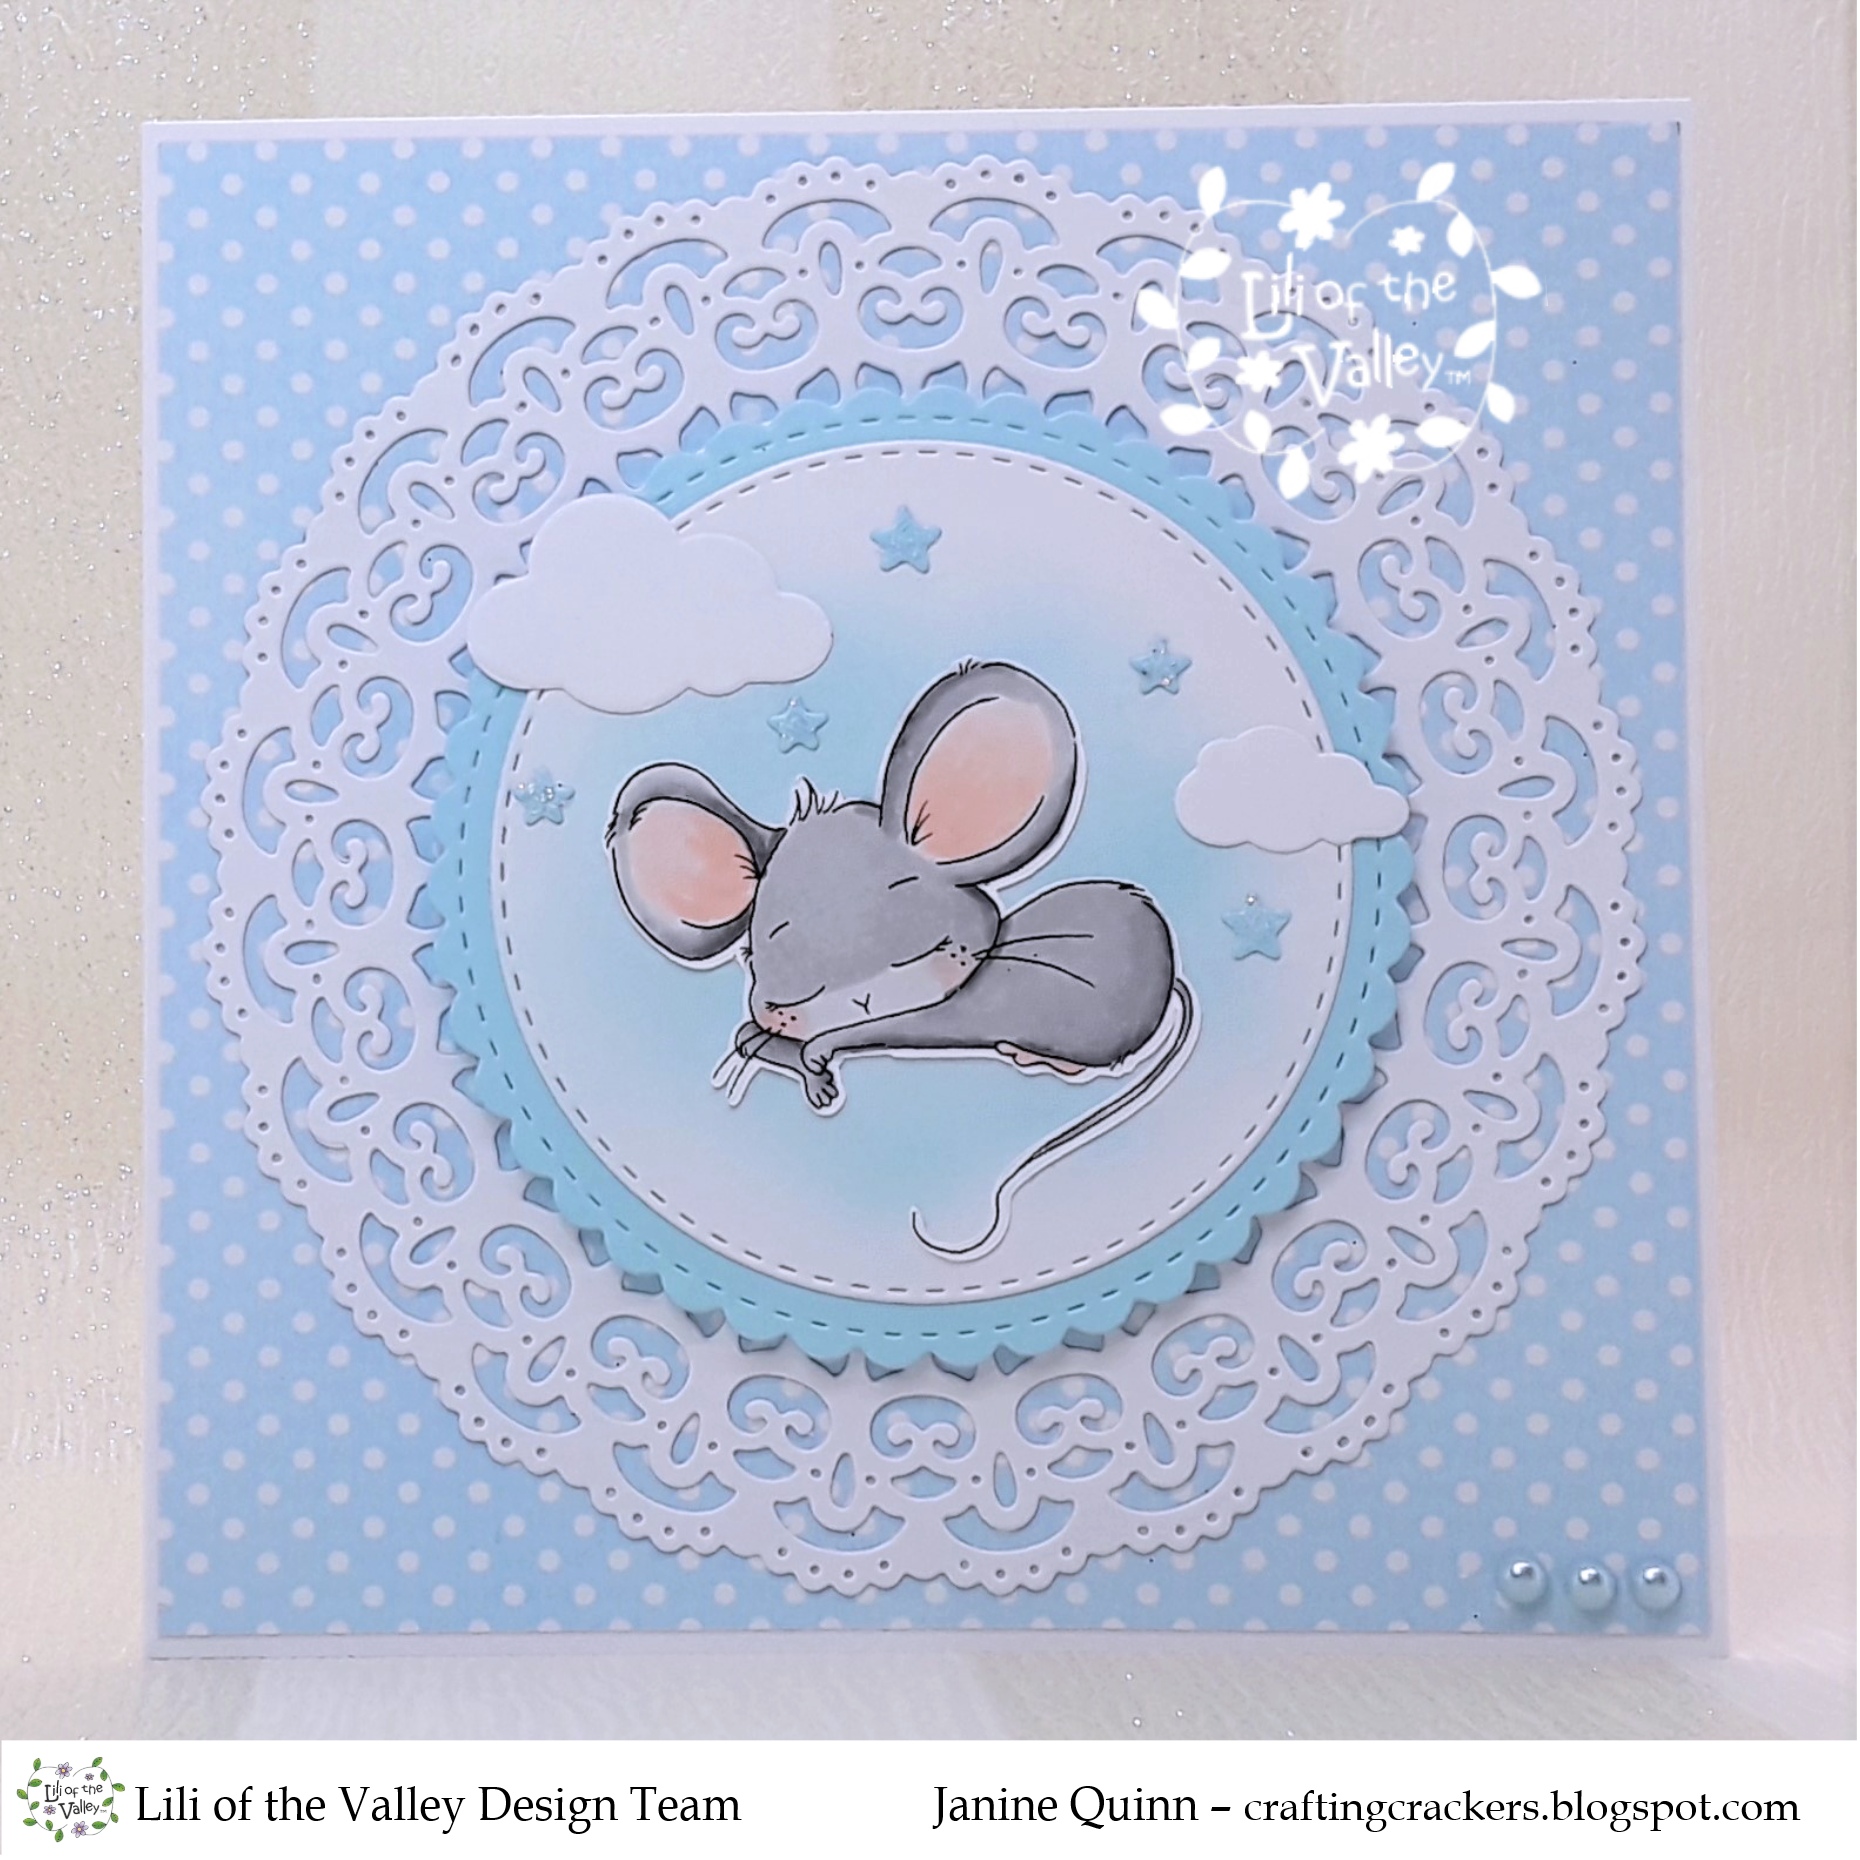
I trimmed down a piece of blue dotty patterned paper to fit the front of a 6" x 6"card blank, leaving a slim border around the edge. A pretty circle doily shape was die cut from white card and glued flat to the front of the card. 

A small circle was cut from white and blue distress ink was added in the centre, then mounted onto a blue scalloped mat. The mouse was stamped in black ink onto colouring cardstock, coloured with Copic pens and fussy cut out.  The mouse was glued onto the circle topper, along with a few glittered stars and clouds. Funky foam was added to the back of the circle topper and added to the centre of the doily circle. To complete the card, blue pearls were added to the bottom of the card.

Polymer Stamp Set: Oh So Mice - Create & Craft and Lili Of The Valley store

Copic Pens: Mouse - N0, N2, N4, N6, N8, C1, R00, R20

Other: 6” x 6” White Card Blank, Make It Colour Blending Card, White & Blue Card, ‘Lullaby’ Paper Pad (Lemoncraft), Stitched Scalloped Circle Die Set (Creative Expressions), ‘Lace Frame’ Die Set (Sweet Dixie), ‘Cloud’ Die Set (Joy! Crafts), ‘Space’ Die Set (Paper Smooches), Distress Ink - Tumbled Glass, Black Fineliner Pen, Glitter, Funky Foam, Pearls, Double Sided Tape, Glue

If you wish to ask a question about any of my cards please leave me a message in the comment with your email address, otherwise I cannot contact you. Alternatively email me at jsnine.quinn@gmail.com

Or why not join us on social media at  'We Love Lili Of the Valley' Facebook Group run by the Design Team, the official Lili Of The Valley Facebook page and on Instagram.  We'd loved to see you.

Please Note - I am part of the Lili Of The Valley's Design Team and I receive their lovely digi images to play with and share with you; I do not receive any monetary reimbursement for my samples, advertisements or my participation. I do, what I do for fun and relaxation. Thank you. x

Thank you so much for dropping by, and please don't forget to say hi :) I'll be back soon with more sneaky peeks of the fabulous new LOTV Love stamps. TTFN

Hugs

x Janine x

Sunday 13 November 2022

Lili Of The Valley - Oh So Mice #1

 Afternoon My Friends

Today I'm sharing one of my cards highlighting the new mice stamps from Lili Of The Valley. There are 8 mice and a balloon in the A5 'Oh Mice' stamp set plus a few sentiments. They are available from Create & Craft.com atm (link below) but will be added to the LOTV Etsy store very soon. For today's card I used one of the sweet mice with a cosmic sky backdrop. I hope you like it. The links to the stamps will be added once they are stocked in the Etsy shop.  
 
For your information, here is the link to the LOTV Etsy Store to check out all the stampsand the LOTV online store to check out the rest of their goodies.


Here's What I Did & Used
First, I created 3 black frames from 2 arch dies (using a large arch die and a slightly smaller one inside and taping them together). I glued the frame shapes together (to give it depth) and added it to the front of a black 5" x 7" top fold card font. I die cut another arch shape from white card using the smaller of the 2 dies. I created a cosmic sky on the white arch card using distress ink (see the colours and order applied in the 'Other's section). To add a little more interest to the sky I used white shimmer ink through a starry sky stencil, than added splashes of white paint over everything. I inserted the shape inside the frame. 

Using the smaller arch die I cut out the shape again from white card, then cut of the top section with a curved hill die. I applied distress ink to the shape to give the illusion of a hilltop. The hillside was glued on top of the background inside the frame. 

The cute little mouse was stamped onto white colouring cardstock, coloured with Copic pens in grey tones and fussy cut out. The mouse was then stuck on the top of the hillside, inside the frame. To finish the card, I added die cut words ' Dream Big' 3 times, glued them together and added black glitter over the top. When dry the sentiment was glued in place in the sky. 

Polymer Stamp Set: Oh So Mice - Create & Craft and Lili Of The Valley store 

Copic Pens: Mouse - N0, N2, N4, N6, N8, C1, R00, R20

Other: 5” x 7” Black Card Blank, Make It Colour Blending Card, White & Black Card, Silver Glitter Card, ‘Stars Starry Night’ Stencil (Memory Box), Background Distress Inks (Squeezed Lemonade, Mustard Seed, Tumbled Glass, Salty Ocean, Faded Jeans, Black Soot, Shabby Shutters, Peeled Paint), Hillside Distress Inks (Shabby Shutters, Peeled Paint, Faded Jeans, Black Soot)  ‘Arched Window’ Die Set (Hunkydory), ‘Dream Big’ Die Set (Xcut), ‘Simple Stitched Hillside Border’ Dies Set (Lawn Fawn), Brilliance Moonlight White Ink, White Acrylic Paint, Black Glitter, Double Sided Tape, Glossy Accents, Glue

If you wish to ask a question about any of my cards please leave me a message in the comment with your email address, otherwise I cannot contact you. Alternatively email me at jsnine.quinn@gmail.com

Or why not join us on social media at  'We Love Lili Of the Valley' Facebook Group run by the Design Team, the official Lili Of The Valley Facebook page and on Instagram.  We'd loved to see you.

Please Note - I am part of the Lili Of The Valley's Design Team and I receive their lovely digi images to play with and share with you; I do not receive any monetary reimbursement for my samples, advertisements or my participation. I do, what I do for fun and relaxation. Thank you. x

Thank you so much for dropping by, and please don't forget to say hi :) I'll be back soon with more sneaky peeks of the fabulous new LOTV Love stamps. TTFN

Hugs

x Janine x

Friday 11 November 2022

Lili Of The Valley - Woof You

Evening everyone

Here is another of my Lili Of The Valley cards using the new polymer stamps sets which launched today on Create & Craft TV. The stamps will then be added to the LOTV Etsy store after this, stock dependant. The new sets include lots of animal stamps - 'Purrfect', 'Woof You', and 'Oh Mice'. For today's card I used one of the stamps from the 'Woof You' stamp set, to create a monochromatic card, the paw print paper was created using the fab paw print stamp.  I hope you like it. The links to the stamps will be added once they are stocked in the Etsy shop.  
 
For your information, here is the link to the LOTV Etsy Store to check out all the stampsand the LOTV online store to check out the rest of their goodies.


Here's What I Did & Used
Using black ink, I randomly stamped lots of paw prints onto white paper and trimmed it down to fit the bottom section on a 6" x 6" black card blank. Two die cut scalloped borders cut from white card were glued to the top section of the patterned paper (facing each other).

The sweet little dog was stamped onto white colouring cardstock, coloured with Copic pens in grey tones and fussy cut out. The dog was then stuck to the front of the card with foam pads along with a die cut sentiment and a few gems.  To finish the card, I added few black pearls to the bottom of the card.

Polymer Stamp Set: Woof You - Create & Craft and Lili Of The Valley store 

Copic Pens: Dog - N0, N2, N4, N6, N8, R02, R22

Other: 6” x 6” Black Card Blank, Copic Pens, Make It Colour Blending Card, White Card, White Paper, Black Ink, Stitched Scalloped Border Die Set (Lawn Fawn), ‘For You’ Die Set (Cut & Make), Silver Glitter Card, White & Black Fineliner Pens, Foam Pads, Pearls, Gems, Double Side Tape, Glue

If you wish to ask a question about any of my cards please leave me a message in the comment with your email address, otherwise I cannot contact you. Alternatively email me at jsnine.quinn@gmail.com

Or why not join us on social media at  'We Love Lili Of the Valley' Facebook Group run by the Design Team, the official Lili Of The Valley Facebook page and on Instagram.  We'd loved to see you.

Please Note - I am part of the Lili Of The Valley's Design Team and I receive their lovely digi images to play with and share with you; I do not receive any monetary reimbursement for my samples, advertisements or my participation. I do, what I do for fun and relaxation. Thank you. x

Thank you so much for dropping by, and please don't forget to say hi :) I'll be back soon with more sneaky peeks of the fabulous new LOTV Love stamps. TTFN

Hugs

x Janine x

Tuesday 8 November 2022

Lili Of The Valley - Purrfect (Pink)

 Evening everyone

I'm back again with another of my Lili Of The Valley cards. As I mentioned yesterday, all week I'm using the brand-new polymer stamps sets which are launching on Create & Craft TV on Friday 11th November at 4pm (GMT). The stamps will then be added to the LOTV Etsy store after this, stock dependant. The new sets include lots of animal stamps - 'Purrfect', 'Woof You', and 'Oh Mice'. FYI you can watch Create & Craft on Sky 683 & Freeview TV and online at Create and Craft.

For my card today I'm using the 'Purrfect' stamp set, which I turned in a cute pink kitty. I hope you like it. The links to the stamps will be added once they are stocked in the Etsy shop.  
 
For your information, here is the link to the LOTV Etsy Store to check out all the stampsand the LOTV online store to check out the rest of their goodies.


Here's What I Did & Used
First, I added a piece of trimmed down piece of pink patterned paper to the front of a 6" x 6" card front, leaving a slim border around the edge. The cute cat was stamped onto white colouring cardstock, coloured with Copic pens in pink tones and fussy cut out. 

Using a frame die I die cut it 3 times from white card and glued them together, pink vellum was added to the back, then the whole thing was glued onto the card front. The cut-out cat was attached to the bottom left-hand corner with foam pads. A die cut sentiment cut from white and pink glitter card was glued to the inside of the frame. To finish the card, I added a few pink pearls to the bottom of the card and gems around the sentiment. 

Polymer Stamp Set: Purrfect - Create & Craft and Lili Of The Valley store 

Copic Pens: Cat - RV000, RV00, RV02, RV10, RV13, RV14

Other: 6” x 6” White Card Blank, Make It Colour Blending Card, White Card, Pink Vellum, ‘Butterfly Kisses’ Paper Pad (LOTV), Pink Glitter Card, Inverted Square Scalloped Die Set (Simple & Basic), ‘Make A Wish’ Die (Cut & Make), Gems, Pearls, Double Sided Tape, Glue

If you wish to ask a question about any of my cards please leave me a message in the comment with your email address, otherwise I cannot contact you. Alternatively email me at jsnine.quinn@gmail.com

Or why not join us on social media at  'We Love Lili Of the Valley' Facebook Group run by the Design Team, the official Lili Of The Valley Facebook page and on Instagram.  We'd loved to see you.

Please Note - I am part of the Lili Of The Valley's Design Team and I receive their lovely digi images to play with and share with you; I do not receive any monetary reimbursement for my samples, advertisements or my participation. I do, what I do for fun and relaxation. Thank you. x

Thank you so much for dropping by, and please don't forget to say hi :)  I'll be back soon with more sneaky peeks of the fabulous new LOTV Love stamps. TTFN

Hugs

x Janine x

Monday 7 November 2022

Lili Of The Valley - Purrfect & Woof You Stamps

Hi everyone

I'm sharing the first of my Lili Of The Valley cards using one of the brand-new polymer stamps sets which are launching on Create & Craft TV on Friday 11th November at 4pm (GMT). The stamps will then be added to the LOTV Etsy store after this, depending on available stock. The new sets include - 'Purrfect', 'Woof You', and 'Oh Mice'. For today's card I combined 2 of the characters from the 'Woof You' and 'Purrfect' stamp sets, aren't they cute. I hope you like it. As soon as the stamps have launched, I will add the links to the stamps. 
 
For your information, here is the link to the LOTV Etsy Store to check out all the stampsand the LOTV online store to check out the rest of their goodies.


Here's What I Did & Used
A piece of brown patterned paper was trimmed down and added to the front of a 5" x 7" card front, leaving a slim border around the edge. 

The cute cat and dog plus a sentiment were stamped next to each other onto tan colouring cardstock. I used Prismacolor pencils to colour both of the animal characters. The scene was then die cut with a rectangle die and mounted onto a white and brown rectangle mat. The complete topper was glued flat onto the card front. To finish the card, I added a stamped and die cut paw print, and white highlights to their eyes. 

Polymer Stamp Set:  

Prismacolor Pencils: Cat - White, 20% Warm Grey, 50% Warm Grey, 70% Warm Grey, Black, Light Peach, Peach, Blush Pink, Pink / Dog - Burnt Ochre, Sienna Brown, Light Umber, Dark Brown, Terracotta, Blush Pink, Pink Carmine Red, Cream, Sand, White, Lemon Yellow / Ground - 50% French Grey, 70% French Grey 

Other: 5” x 7” White Card Blank, Desert Storm Neenah Card, White & Brown Card, Paper Pad (unknown), Mats & Layers - Rectangle Die Set (Crafter’s Companion), ‘You Have My Heart’ Stamp & Die Set (MFT), Gathered Twig Distress Ink, White & Black Fineliner Pens, Double Sided Tape, Black Ink, Glue

If you wish to ask a question about any of my cards please leave me a message in the comment with your email address, otherwise I cannot contact you. Alternatively email me at jsnine.quinn@gmail.com

Or why not join us on social media at  'We Love Lili Of the Valley' Facebook Group run by the Design Team, the official Lili Of The Valley Facebook page and on Instagram.  We'd loved to see you.

Please Note - I am part of the Lili Of The Valley's Design Team and I receive their lovely digi images to play with and share with you; I do not receive any monetary reimbursement for my samples, advertisements or my participation. I do, what I do for fun and relaxation. Thank you. x

Thank you so much for dropping by, and please don't forget to say hi :)  I'll be back soon with more sneaky peeks of the fabulous new LOTV Love stamps. TTFN

Hugs

x Janine x

Sunday 23 October 2022

Amanda Jayne Designs - Halloween Cuties Bundle #2

Hi everyone

I'm sharing my latest and last cards for Amanda Jayne Designs images.  For my card today I used cute little cow from the 'Halloween Cuties Bundle' - the bundle includes 8 character digi stamps and 32 digital papers. I created this card to promote the new monthly facebook challenge competition, with the chance to win 2 digis and 2 paper packs of your choice. 

For October's challenge, all you have to do create a project using at least one of Amanda's digital products with a Halloween or autumn theme. Good luck! If you're not a member of her facebook group, the link is at the bottom of this post.

Amanda has a lovely array of digi stamp, papers and sentiments in her Etsy shop, along with some pre-coloured images and papers. For your information, here is the link to the Amanda Jayne Designs Etsy Store or go to Etsy and search for Amanda Jane Designs 80 to check out all her lovely digi stamps and papers.


Here's What I Did
I trimmed down a piece of black webbed patterned paper and added it to the front of a black 6" x 6" card blank, leaving a slim border around the edge. 

Next, I imported the cute wizarding cow into my software program and created a border around him. I included a sentiment and spiders web to the design; then resized everything to fit my project. The scene was printed it onto Copic friendly card and coloured using my Copic pens. Using a filler stamp I added little swirls and hearts with purple ink. The finished picture was die cut into a square, then matted and layered onto grey and black card. To finish the card, the completed topper was mounted onto the front of the card blank. 

Here's What I Used
Digi Stamps: 'Halloween Cuties Bundle'

Copic Pencils: Cow - E50, E51, E53, E57, E31, E33, E35, R00, R11, R20 / Hat - V12, V15, V17 / Broom - E31, E33, E35, Y21

Other: 'Make It Colour' Blending Card, Black Card, Stitched Scalloped Square Die Set (Creative Expressions), 'Grunge - Dark Tones' & 'Happy Hauntings' Paper Pad (Craft Consortium), 'Love You, Mean It' Stamp Set (Concord & 9th), Halloween Sentiment & Spider's Web Digi Stamps (Lili Of The Valley), Lulu Lavender Memento Ink, Glue, Funky Foam

We have a lovely facebook group called Amanda Jayne Design Inspiration Group, or why not follow Amanda Jayne Designs on Instagram @amandajaynedesigns

If you wish to ask a question about any of my cards please leave me a message in the comment with your email address, otherwise I cannot contact you. Alternatively email me at jsnine.quinn@gmail.com

Please Note - I am designing for Amanda Jayne Designs and I receive her lovely digi images and papers to play with and share with you; I do not receive any monetary reimbursement for my samples, advertisements or my participation. I do, what I do for fun and relaxation. Thank you. x

Thank you so much for dropping by, and please don't forget to say hi :). I'll be back soon with more cards using Amanda Jayne Designs stamps and papers etc. TTFN

Hugs

x Janine x

Friday 14 October 2022

Amanda Jayne Designs - Halloween Cuties Bundle

Hi everyone

I'm sharing my latest card using one of Amanda Jayne Designs images.  For my card today I used cute little dragon from the 'Halloween Cuties Bundle' - the bundle includes 8 character digi stamps and 32 digital papers. Daisy the dragon was coloured with Copic pens and added to a 3D haunted house card base with flying bats. 

Amanda has a lovely array of digi stamp, papers and sentiments in her Etsy shop, along with some pre-coloured images and papers. For your information, here is the link to the Amanda Jayne Designs Etsy Store or go to Etsy and search for Amanda Jane Designs 80 to check out all her lovely digi stamps and papers.


Here's What I Did
I imported the cute dragon into my software program, and it resized it to fit my project then printed it onto Copic friendly card. The dragon was coloured using my Copic pens and then fussy cut out. I typed up a sentiment, printed and cut it out with a banner die.

Using my Silhouette cutting machine design software I created a card base for the haunted house cutting file I had already had; everything was cut out along with an orange background to go behind the house. Using a couple of Copic pens I added extra colour to the door and windows. A couple of bats were also cut out using the cutting machine, and acetate strips were attached to the back of them

The black cut out house and orange background were stuck to the card front, with the bat acetate strips inserted in between them. To finish the card both the sentiment and dragon were added to the card front.  

Here's What I Used
Digi Stamps: 'Halloween Cuties Bundle'

Copic Pencils: Dragon - YG01, YG03, YG23, YG67, BG10, BG11, BG13, BG49 / Pumpkin - Y17, YR15, YR16, E08, E31, E33, E35 / Haunted house Windows - YR00, YR02

Other: 'Make It Colour' Blending Card, White, Black & Orange Card, Acetate, White Pen, Sentiment Banner Die (Lawn Fawn), Silhouette Cutting Machine, House & Bats Cutting File, Glue, Foam Pads

We have a lovely facebook group called Amanda Jayne Design Inspiration Group, or why not follow Amanda Jayne Designs on Instagam @amandajaynedesigns

If you wish to ask a question about any of my cards please leave me a message in the comment with your email address, otherwise I cannot contact you. Alternatively email me at jsnine.quinn@gmail.com

Please Note - I am designing for Amanda Jayne Designs and I receive her lovely digi images and papers to play with and share with you; I do not receive any monetary reimbursement for my samples, advertisements or my participation. I do, what I do for fun and relaxation. Thank you. x

Thank you so much for dropping by, and please don't forget to say hi :). I'll be back soon with more cards using Amanda Jayne Designs stamps and papers etc. TTFN

Hugs

x Janine x

Monday 10 October 2022

Lili Of The Valley - Little Ghosts

Afternoon everyone

I'm sharing the last of my Lili Of The Valley Halloween cards using the new polymer stamps sets which have just launched in the LOTV Etsy store. As I mentioned in my previous post the new sets include - Little Ghosts, Hello Pumpkin, Cute Witches, Spooky Silhouettes, Halloween Gnomes and Autumn Sentiment Tags. 

For my cards today I used the 'Little Ghosts' stamp set again, I love these little ghosts as they're a lovely size -approx 2"-2½" high, and so easy to colour up. I decided to create a couple of Halloween party invites as they're really good for batch making. I used Prismacolor pencils and grey card designed for pastel pencils, to give them a little texture. I hope you like them. 
 
For your information, here is the link to the LOTV Etsy Store to check out all the stampsand the LOTV online store to check out the rest of their goodies.

Here's What I Did & Used
I used the same process for both cards - I added grey grunge paper to the front of white 5" x 5" card blanks, leaving a slim border around the edge. Next the cute ghosts and a couple of sentiments were stamped onto grey card and die cut using a square die. The images were then coloured up using Prismacolor pencils, and finally mounted onto fancy edged black die cut squares. The completed toppers were glued to the front of the card blanks. Glossy accents was added to all the eyes on both cards to make them shine. 

To finish the cards, I added die cut black stars and a little glitter to the pumpkin and wand. 

Polymer Stamp Set: Little Ghosts

Prismacolor Pencils: Ghosts - White, 20%, 50% & 70% Cool Grey, Blush Pink, Pink, Black / Hat - 20%, 50% Cool Grey, Black, Lilac, Parma Violet, Dark Purple / Wand - Canary Yellow, Yellowed Orange, Sienna Brown, Tuscan Red / Pumpkin Bag - Canary Yellow, Sunburst Yellow, Pale Vermilion, Yellowed Orange, Chartreuse, Grass Green

Other: White 5" x 5" Card Blanks, Grey Pastel Card, Black Card, 'Grunge - Dark Tones' Paper Pad (Craft Consortium), Decorative Nested Square Die Set (Craft Buddy), Swirly Stars Die Set (Sizzix), Starry Skies Die Set (Lawn Fawn), Glossy Accents, Glitter, Double Sided Tape, Glue

If you wish to ask a question about any of my cards please leave me a message in the comment with your email address, otherwise I cannot contact you. Alternatively email me at jsnine.quinn@gmail.com

Or why not join us on social media at  'We Love Lili Of the Valley' Facebook Group run by the Design Team, the official Lili Of The Valley Facebook page and on Instagram.  We'd loved to see you.

Please Note - I am part of the Lili Of The Valley's Design Team and I receive their lovely digi images to play with and share with you; I do not receive any monetary reimbursement for my samples, advertisements or my participation. I do, what I do for fun and relaxation. Thank you. x

Thank you so much for dropping by, and please don't forget to say hi :)  I'll be back soon with more sneaky peeks of the fabulous new LOTV Love stamps. TTFN

Hugs

x Janine x

Saturday 8 October 2022

Lili Of The Valley - Little Ghosts

 Hi there everyone

I'm sharing more of my Lili Of The Valley cards using another of the new polymer stamps sets which have just launched in the LOTV Etsy store. The new sets include - Little Ghosts, Hello Pumpkin, Cute Witches, Spooky Silhouettes, Halloween Gnomes and Autumn Sentiment Tags. For my cards today I used the 'Little Ghosts' stamp set, which are really cute and so easy to colour up. To keep everything fresh looking I've kept the colours to 2 per card plus a little grey.  I hope you like them. 
 
For your information, here is the link to the LOTV Etsy Store to check out all the stampsand the LOTV online store to check out the rest of their goodies.

CARD #1


Here's What I Did & Used
The process was the same on both cards. I stamped the cute ghosts and a sentiment onto colouring cardstock at different angles. When everything was stamped, it was die cut with a rectangle die, and in some cases the ghosts had a little cropped off to add a little extra interest. The images were coloured using Copic pens using only 2 colourways on each card including a little grey. The scenes were then mounted onto a black die cut rectangle and then onto their respective colour mats - either purple or orange. 

The completed toppers were mounted onto 5" x 7" top fold black card blanks. Glossy accents was added to all the eyes on both cards to make them shine. To finish the cards, I added die cut stars and glitter to all the main focal points. 

Polymer Stamp Set: Little Ghosts

Copics Pens: Ghosts - C1, C2 / Accessories - YG01, YG03, YG17, E31, E35, C2, C3, C5, C7, Y15, Y17, YR07, YR15, YR16, V12, V15, V17

Other: Black 5" x 7" Card Blanks, Make It Colour Blending Card, Black, Orange, Purple, Green Card, Mats & Layers Die Set (Crafters Companion), Swirly Stars Die Set (Sizzix), Glossy Accents, Glitter, Double Sided Tape, Glue

If you wish to ask a question about any of my cards please leave me a message in the comment with your email address, otherwise I cannot contact you. Alternatively email me at jsnine.quinn@gmail.com

Or why not join us on social media at  'We Love Lili Of the Valley' Facebook Group run by the Design Team, the official Lili Of The Valley Facebook page and on Instagram.  We'd loved to see you.

Please Note - I am part of the Lili Of The Valley's Design Team and I receive their lovely digi images to play with and share with you; I do not receive any monetary reimbursement for my samples, advertisements or my participation. I do, what I do for fun and relaxation. Thank you. x

Thank you so much for dropping by, and please don't forget to say hi :)  I'll be back soon with more sneaky peeks of the fabulous new LOTV Love stamps. TTFN

Hugs

x Janine x

Wednesday 5 October 2022

Lili Of The Valley - Cute Witches

Hi there everyone

I'm sharing the first of my Lili Of The Valley cards using one of the new polymer stamps sets which have just launched in the LOTV Etsy store. The new sets include - Hello Pumpkin, Little Ghosts, Cute Witches' Spooky Silhouettes, Halloween Gnomes and Autumn Sentiment Tags. For my cards today I used the 'Cute Witches' stamp set, aren't they adorable. I have included the details for each individual card for your information below. There are also a digi version of the stamps I've used, just go to the etsy store and search the 'Halloween Designs' option. I hope you like them. 
 
For your information, here is the link to the LOTV Etsy Store to check out all the stampsand the LOTV online store to check out the rest of their goodies.

CARD #1

Here's What I Did & Used
I stamped the cute witch and a sentiment onto colouring cardstock and die cut with a square die. The image was stamped again onto masking paper and fussy cut out, the mask was placed over the top of the witch and her moon. I added distressing inks all over the paper to create the sky (see the list below), then splash a little water over it. To add a little more interest I watered down some white and black chalk paint, then splashed a little over the sky area as well. I did add a few extra dots using a black and white pen. I repeated the inky process again to create a sheet of galaxy paper which I trimmed down add to the front of a black card blank, leaving a slim border around the edge.

Once everything was dry the paper mask was removed from the witch/moon, and it was coloured using Copic pens. The scene was then mounted onto a black die cut square and funky foam was glued to the back. The complete topper was glued to the card front. To finish the card, I added a few die cut stars and a little glitter to the wand. 

Polymer Stamp Set: Cute Witches

Copics Pens: Witch - Skin - E000, E00, E11, E02 / Hair - E13, E99 / Hat - C2, C3, C5, C7 / Clothing - V12, V15, V17, Y17, B12, B14, B16 / Wand - E13, E99, Y15, Y17 / Moon - W1, W2, W3. W5, W7 / Spider - C5, C7

Other: Black 6" x 6" Card Blank, Make It Colour Blending Card, Black Card, 'Scalloped Stitched Square' Die Set (Creative Expression), Silver Glitter Card, Starry Skies Die Set (Lawn Fawn), Distress ink - Tumbled Glass, Salty Ocean, Faded Jeans, Squeezed Lemonade, Fossilized Amber, Worn Lipstick, Wilted Violet, Black Soot, Water, White & Black Acrylic Paint, White & Black Pen, Masking Paper, Funky Foam, Glitter, Double Sided Tape, Glue

CARD #2


Here's What I Did & Used
A piece of Halloween paper was trimmed down and add to the front of a black card blank, leaving a slim border around the edge. The witch, cauldron and a sentiment were stamped onto colouring cardstock and die cut it into a square. The images were stamped out again onto masking paper and fussy cut out, the masks were placed over the top of the images. Grey distress ink was applied around the square to create a moody atmosphere, then lots of dots using a black, orange and green pen were added over the top. 

Once the ink was dry the paper masks were removed, and everything was coloured using Copic pens. The scene was then mounted onto a black die cut square and funky foam was glued to the back. The complete topper was glued to the card front. To finish the card, I added a few die cut stars along with little glitter to the wand and cauldron.

Polymer Stamp Set: Cute Witches

Copics Pens: Witch - Skin - E000, E00, E11, E02 / Hat - C2, C3, C5, C7 / Clothing - Y15, Y38, YR15, YR16, V12, V15, V17, YG01, YG03 / Hair - E13, E99 / Wand - E13, E99, Y08, YR16 / Cauldron C1, C2, C3, C7, YG02, YG03, YG67 / Ground - W1, W2, W3 / Dots - YG03, 00, YR15

Other: Black 6" x 6" Card Blank, Make It Colour Blending Card, Black Card, 'Doily Edge Square' Die Set (Tattered Lace), Swirling Stars Die Set (Sizzix), 'Happy Haunting' Paper Pad (Craft Consortium), Distress Ink - Hickory Smoke, Masking Paper, Funky Foam, Glitter, Double Sided Tape, Glue

If you wish to ask a question about any of my cards please leave me a message in the comment with your email address, otherwise I cannot contact you. Alternatively email me at jsnine.quinn@gmail.com

Or why not join us on social media at  'We Love Lili Of the Valley' Facebook Group run by the Design Team, the official Lili Of The Valley Facebook page and on Instagram.  We'd loved to see you.

Please Note - I am part of the Lili Of The Valley's Design Team and I receive their lovely digi images to play with and share with you; I do not receive any monetary reimbursement for my samples, advertisements or my participation. I do, what I do for fun and relaxation. Thank you. x

Thank you so much for dropping by, and please don't forget to say hi :)  I'll be back soon with more sneaky peeks of the fabulous new LOTV Love stamps. TTFN

Hugs

x Janine x

Friday 30 September 2022

Amanda Jayne Design - Chloe Christmas Bundle

Hi everyone

I'm sharing my latest card using one of Amanda Jayne Designs images.  I used a fabulous Christmas bundle called 'Chloe Christmas Collection' - the bundle includes 49 digital elements such as Chloe in different poses, papers, wreaths and frames. Chloe the cow was coloured with Copic pens, the green wreath was pre-coloured. (For sale - £4.50 + P&P - requests by email please)  

Amanda has a lovely array of digi stamp, papers and sentiments in her Etsy shop, along with some pre-coloured images and papers. For your information, here is the link to the Amanda Jayne Designs Etsy Store or go to Etsy and search for Amanda Jane Designs 80 to check out all her lovely digi stamps and papers.


Here's What I Did
I imported the wreath and Chloe with her little wreath, along with a sentiment from my digi stash into my software program. I resized all the images collectively to fit my project. I printed out everything onto Copic friendly card, then coloured it up using my pens. The completed scene was die cut into a square and matted onto green scalloped card. To finish the card, I added red gems and glitter around the wreath.

Here's What I Used

Copic Pencils: Cow - E000, E00, E31, E50, E51, E53, E57, E59 / Wreath - YG01, YG03, YG17, YG67, R17 / Bow - R05, R17, R29 / Ice - B0000, B000, B00

Other: 6" x 6" White Scalloped Card Blank, 'Make It Colour' Blending Card, Green Card, 'It's The Most Wonderful Time Of The Year' 12" x 12" Paper Pad, 'Happy Christmas' Sentiment (Lili Of the Valley), Stitched Scalloped Square Die Set (Creative Expressions), Red Gems, Red Glitter, Double Sided Tape

We have a lovely facebook group called Amanda Jayne Design Inspiration Group, or why not follow Amanda Jayne Designs on Instagam @amandajaynedesigns

If you wish to ask a question about any of my cards please leave me a message in the comment with your email address, otherwise I cannot contact you. Alternatively email me at jsnine.quinn@gmail.com

Please Note - I am designing for Amanda Jayne Designs and I receive her lovely digi images and papers to play with and share with you; I do not receive any monetary reimbursement for my samples, advertisements or my participation. I do, what I do for fun and relaxation. Thank you. x

Thank you so much for dropping by, and please don't forget to say hi :)  I'll be back soon with more cards using Amanda Jayne Designs stamps. TTFN

Hugs

x Janine x

Thursday 8 September 2022

Lili Of The Valley - Snow Globes

Hi everyone

Today I'm sharing the last of my sneaky peaks of the new Lili Of The Valley Christmas polymer stamps launching this Saturday (10th) at the Crafterama event in Harrogate. The stamps will then be available in the  LOTV Etsy shop on the 12th September.

For my 2 cards today I've used the fabulous 'Snowglobes' stamps. The set includes an empty snowglobe and 6 images to going inside plus a load of sentiments, obviously the images and the sentiments can be used independently of the snow globe if you wish. I have included the details for each individual card for your information. All the links will be added after I return from my holiday, but don't forget you can simply go to the LOTV Etsy Store to and search under the polymer stamps listing from the 12th Sept onwards. I hope you like them.

CARD #1 - Here's What I Did & Used
I trimmed down a piece of red card and attached it to the front of a DL white card blank leaving a slim border around the edge. A white scalloped rectangle was glued flat onto the card front.

I die cut a rectangle of the same red card and stamped snowflakes all over it using white ink, and going off the edge in certain places. When it was dry this was glued into the centre of the white rectangle. 

The snow globe and house was stamped onto Copic friendly card, coloured with Copic pens and fussy cut out. Two empty snow globes were stamped onto card and then fussy cut out slightly smaller than the image, these were glued to the back of the coloured version to add a little extra dimension. The finished snow globe was added to the bottom section of the card. Glitter was added to the snow in the scene.

To finish the card a festive sentiment was die cut twice and stacked up, then added to the top of the card along with a few sequins. 

Polymer Stamp Set: 'Snow Globes' - to be added

Copic Pens: Snow Globe Base - E31, E33, E35, E37 / Background - B0000, B000 / House - R17, R37, E31, E33, E35, B0000, B000, BG10, BG11 / Trees - YG03, YG17, YG67 / Snow - BG10, BG11

Other: DL White Card Blank, Make It Colour Blending Card, White & Red Card, Unicorn White Ink (Hero Arts), Grunge Snowflakes Polymer Stamps (LOTV), 'Merry & Bright' Die (Xcut), Nested Scalloped Slim Dies (Lisa Horton), Sequins, Glitter, Double Sided Tape, Glue

CARD #2 - Here's What I Did & Used
I trimmed down a piece of blue Christmas patterned paper and attached it to the front of a 6" x 6" white card blank leaving a slim border around the edge. A die cut festive frame was glued flat in the centre. 

The snow globe and snowman scene were stamped onto Copic friendly card, and coloured with Copic pens, then die cut into a square. The fished scene was matted onto a blue scalloped frame. Funky foam was added to the back of the topper and glued into the centre of the white festive frame.  To finish the card I added a little glitter and a few pearls.

Polymer Stamp Set: 'Snow Globes' - To be added

Copic Pens: Snow Globe Base - E31, E33, E35, E37 / Background - B0000, B000 / Snowman  & Outfit - BG10, BG11, BG12, B14, B16, R17, R37, C1, C3, C7, Y16 / Trees - YG03, YG17, YG67 / Snow - BG10, BG11 

Other: 6" x 6" White Card Blank, White & Blue Card, 'Frosty Christmas' Paper Pad (LOTV), 'Scalloped Stitched Circle' Die Set (Creative Expression), 'Holly & Swirls - Peace frame' (Sweet Dixie), Make It Colour Blending Card, White pen, Funky Foam, Glitter, Pearl, Double Sided Tape, Glue

If you wish to ask a question about any of my cards please leave me a message in the comment with your email address, otherwise I cannot contact you. Alternatively email me at jsnine.quinn@gmail.com

Or why not join us on social media at  'We Love Lili Of the Valley' Facebook Group run by the Design Team, the official Lili Of The Valley Facebook page and on Instagram.  We'd loved to see you.

Please Note - I am part of the Lili Of The Valley's Design Team and I receive their lovely digi images to play with and share with you; I do not receive any monetary reimbursement for my samples, advertisements or my participation. I do, what I do for fun and relaxation. Thank you. x

Thank you so much for dropping by, and please don't forget to say hi :)  I'll be back soon with more sneaky peeks of the fabulous new LOTV Love stamps. TTFN

Hugs

x Janine x