Friday 28 August 2015

Tiddly Inks Fab Friday - My Last Design Team Post

Hello and good morning....
 
Sob...Sob...Sob!!!

Well today is my last official Design Team card for Tiddly Inks and I'm soooo sad :(
I've had a fabulous time on the uber talented DT, and had the pleasure of working with Christy's amazing images. Thank you to all the girls over at Tiddly Inks I've had a fab time and you never know I might be back in the future...mwah!!!

Good luck to the new interim Design Team (when you're appointed) I'm sure you'll have a brilliant time.
  
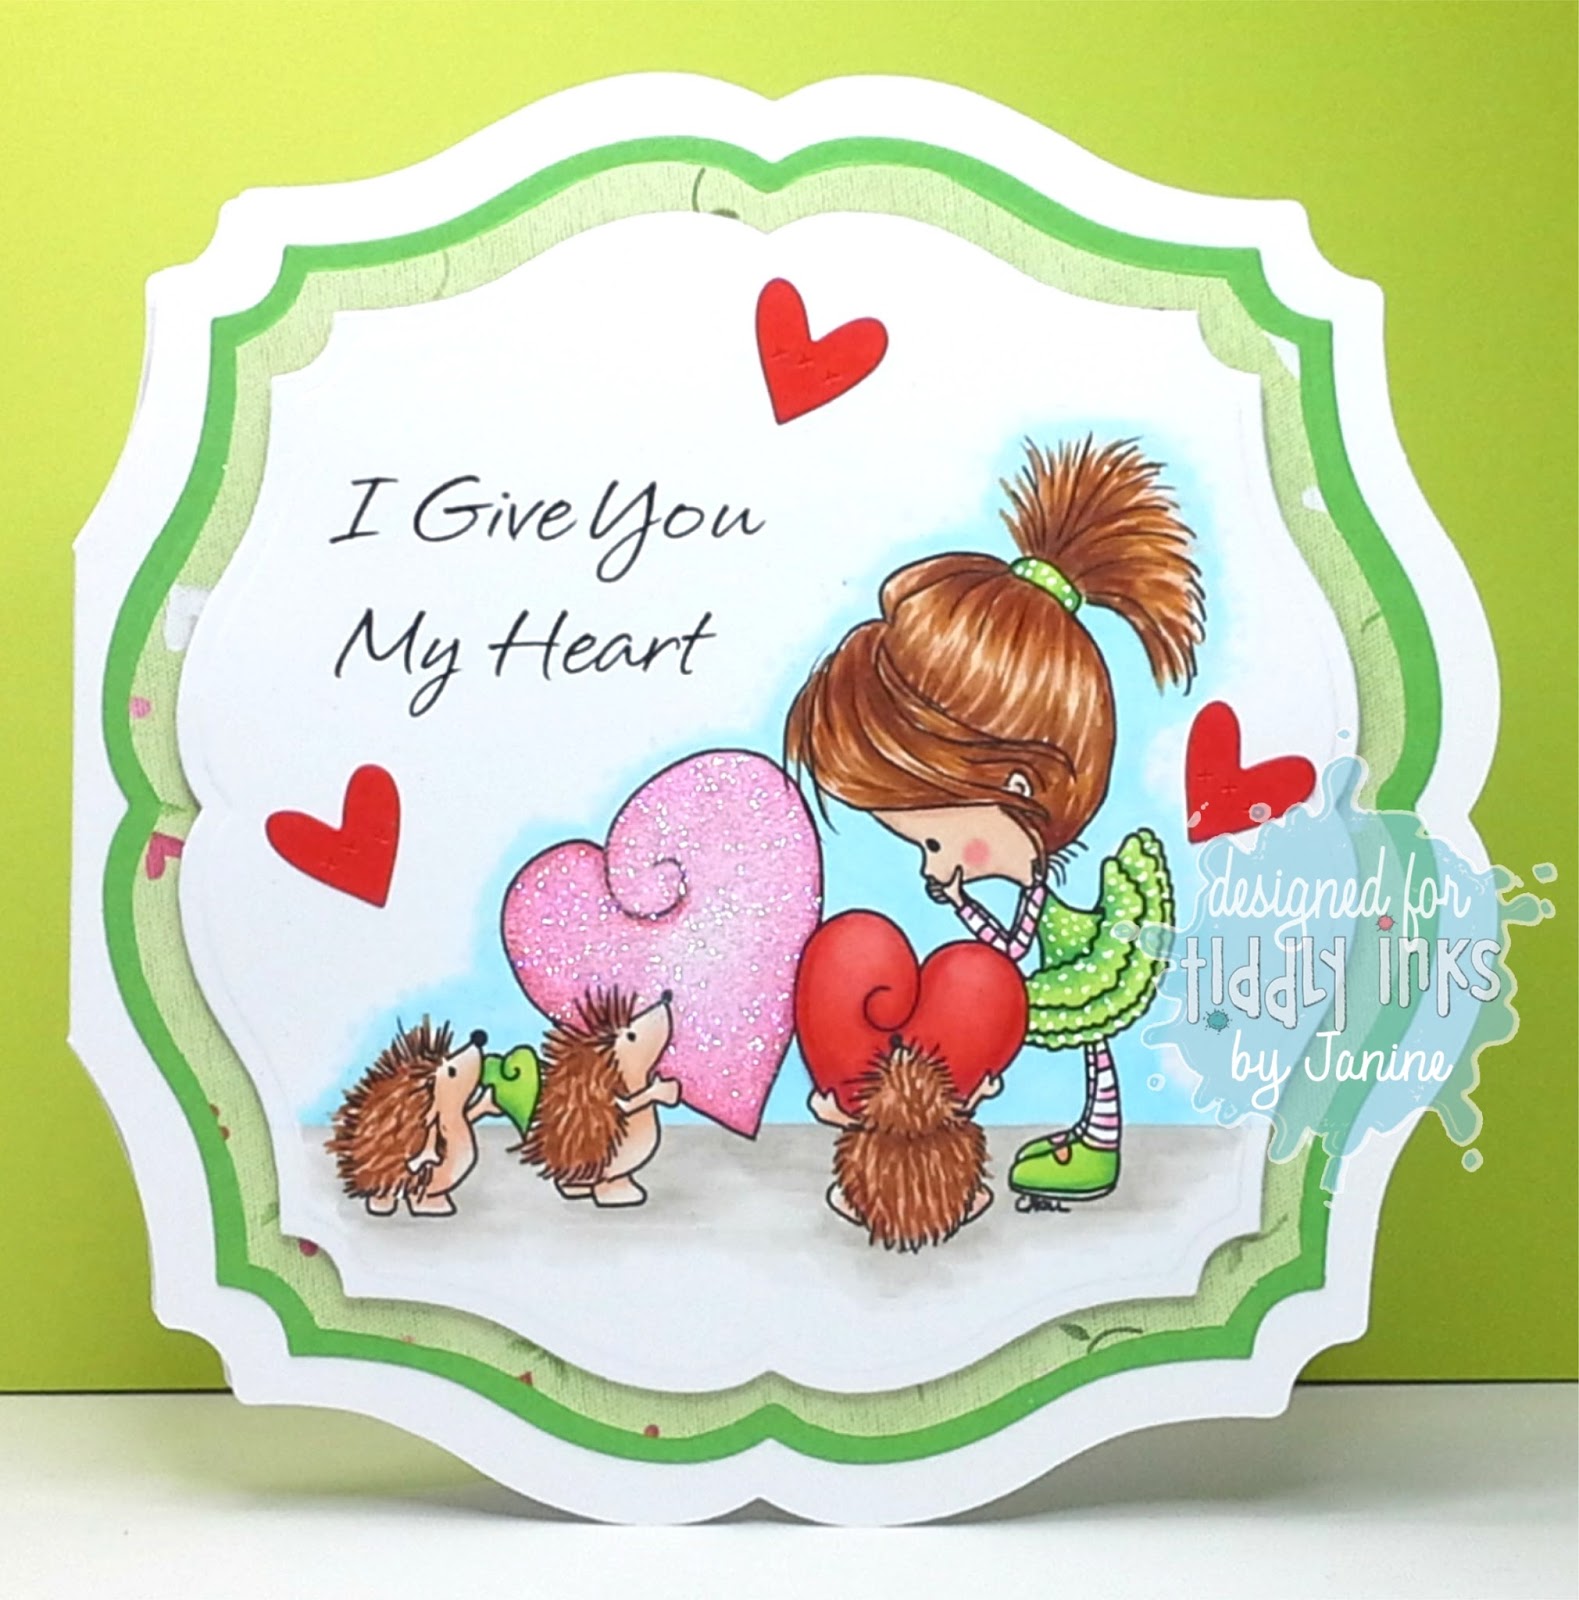
 So onto my last Tiddly Inks Fab Friday creation for you - I decided to use the ever so pretty Wryn digi stamp called 'Wryn-The BBQ Queen', which makes a great summer card...well if we'd actually had a summer that it. I actually gave this card to a friend who was kind enough to make my hubbie and I a fabulous BBQ lunch last Sunday. I used green for my colour theme as her living room and kitchen were super modern and all in lime green so I knew I couldn't go wrong really. Lol! The 'Thank you' sentiment was for both my friend, Christy and the Design Team.


Here's What I Did
1 used a white scalloped 5" x 7" card base which I matted with some green card.  I printed my image directly onto some colouring card stock, die cut it into a rectangle and coloured it with Copic pens.

Next I printed my sentiment directly onto my patterned paper and die cut it into a rectangle shape, and cut 2 strips off. The finished image and the strips were all added to the card base. Then to finish off I added a few die cut buttons, a pearl, crystal drops and a few punched out butterflies.

Here's what I Used
Digital Image: 'Wryn-The BBQ Queen' from the Tiddly Inks store
Copics - Skin - E0000, E000, E00, E11, R20 / Hair - YR0000, YR000, YR00, E13, E99, E57 / Dress, Shoes, BBQ  - YG00, YG01, YG03, YG17 / Pinafore - RV00, RV02, RV10, RV13 / Sausages & Burgers - YR000, YR00, E13, E 37, E99 / Utensils, Shoe Soles, Smoke & BBQ Trim - C0, C1, C2, C3, C5 
Dies: Crealies XXL 'Stitched Rectangles', Die 'Sire 'Flower Buttons'
Paper/Card (CS): White Card Base, Neenah Colouring CS, Green CS, LOTV 'Butterfly Kisses' Paper Pad
Other: Serif CA2, Glitter, Butterfly Punch, Tonic Nuvo Crystal Drops

Make sure you pop over to Tiddly Inks blog to see what my other fab teamies have created for you today -- click on the logo below:
 
http://www.tiddlyinkschallenge.blogspot.co.uk/
 
Pssst, don't forget to join in with our fun 'Have A Heart' challenge. So why not grab your Tiddly Inks image and join in  with us - click here to enter.

I hope you'll continue to visit my blog and check out my makes, and see what new things I get up to....sssh! I can't say any more that this stage :)

Big Hugs

Janine
xxx

Wednesday 19 August 2015

Sugar Nellie Design Team Card - Make A Wish

- Hello Sugar Fans -
Good morning, well I hope the weather is better where you are, because it's pretty rubbish in my part of the UK. That'll teach me to buy new garden furniture...Sob!!
Anyhoo, it's Wednesday and my turn to share my Sugar Nellie card with you.  This week I thought I would bring a little bit of fairy magic into your life - so for my card I used the fabulous 'Make A Wish' digital stamp from Funkykits. I just think she's such a pretty little thing, and I've been wanting to use her for ages but never actually got around to it. I also got to use some texture paste for the first time....I love it!


Here's What I Did
I used a 6" x 6" scallop card blank and matted it with deep blue card.  Firstly I printed my image directly onto some lemon card and die cut it into a circle, this was then stencilled with stars using glittery texture paste which gave it a pretty raised effect. When the paste was dry I matted it onto a blue die cut circle and added it to my card base, along with a blue stencilled strip.

I printed the image again onto my colouring cardstock and I coloured it with Copic Markers and then fussy cut it out, this was then added on top of the lemon circle and attached to my card base. To finish off I added glitter to her wand and wings, and added a few die cut buttons with a gem.
Here's What I Used
Digi Stamp: 'Make A Wish' from Sugar Nellie at Funkykits
Paper/Cardstock (CS): Craftwork Super Smooth Digital CS, Topsy Turvy CS, Lemon CS
Copics: Skin: E0000, E000, E00, E11, E02 / Hair - YR0000, YR000, YR00, E13, E18, E99, E37 / Dress & Shoes - B0000, B000, B00, BG01, BG72 / Wings - B000, B00, RV00, RV02, RV04 / Wand - Y00, Y006, Y08, Y17
Dies: Tonic Square Layering Dies, Crealies XXL 'Stitched Circles', Die'sire 'Flower Buttons'
Other: Wink Of Stella Clear Glitter Pen, Gem, Memory Box 'Stars Starry Nights' Stencil, Cosmic Shimmer 'Sparkle' Texture Paste, Distressing Ink, LOTV 'Sentiment Tag' Stamp Set

Don't forget if you want to see more Sugar Nellie creations made my lovely teamies why not drop by the Sugar Nellie blog or join our Facebook page (just search for the Official Sugar Nellie Group).

Why not join in with the challenge over at the Sugar Bowl - there's still  time to enter with a great prize up for grabs. The theme this month is 'Anything Goes' so it's really easy. DON'T FORGET TO ENTER THE CHALLENGE YOU MUST USE a Sugar Nellie stamp. 
I look forward to seeing you soon. Why not leave me a message so I know who's out there - I'd love to hear from you!!

Challenge Entered:
 
Hugs & kisses
x Janine x

Tuesday 18 August 2015

Tiddly inks Challenge #164 - Have A Heart

 - Good Morning Tiddly Inkers -

Hi everyone, sadly this is my last Design Team challenge card for Tiddly Inks....sob, sob!! So here it is for Challenge #164 - the theme is week is 'Have A Heart' so grab your Tiddly Inks digi or acrylic stamp and join in with the fun.

For my last card I used the gorgeous digital stamp called Be Mine and coloured it with Copic pens. This is digi is such great value as you get 2 totally different digital stamps in the set. 


Here's What I Did
I used a shaped white card base which I matted with green card and patterned paper. I printed my image and a sentiment onto my colouring card stock which I coloured it with Copic pens - this was attached to my card base with foam tape.

To finished off I added clear glitter to the pink heart, white dots to her dress and scattered a few red die cut hearts around the image.

Here's what I Used
Digital Image: Be Mine from Tiddly Inks
Cardstock (CS): Green & Red CS, Craftwork Cards Digital Super Smooth CS, LOTV 'Butterfly Kisses' Paper Pad
Copics:  Skin - E0000, E000, E00, E11, R20 / Hair - YR0000, YR000, YR00, E13, E99, E37 / Hedhogs - YR0000, YR000, R11, E13, E37 / Dress, Heart & Shoes - YG00, YG01, YG03, G03 / Pink Heart - RV000, RV02, RV10, RV23 / Red Heart - R000, R14, R20, R27, R32 / Tights & Sleeves - RV02, RV10 / Sky - B0000, B000, 0 / Ground - W0, W1, W2
Dies: Go Kreate 'Large Frames Frilly #10', Memory Box 'Cross Stitched Hearts'
Other: Craftartist 2, Glitter, White Pen

I hope you'll drop by the Tiddly Inks Challenge Blog to take a peek at what the other lovely Design Team ladies have come up with. I look forward to seeing what you make :)

Click on the logo below:-
http://tiddlyinkschallenge.blogspot.co.uk/
 Hugs
Janine
xxx

Friday 14 August 2015

Tiddly Inks Fab Friday - Somebunny To Love You!

Hello and good morning....
 
Well my 4 month term with Tiddly Inks is almost up and it's been a blast! I'm so grateful for the opportunity to work with Christy's fabulous images; there's so many to choose from that I've been constantly spoilt for choice. It's been such 'hard work' working with all her gorgeous drawings but hey someone has to do it, and I'm going to miss it. LOL! So on that note there is a new Tiddly Inks Design Team Call Out - so if you love Tiddly Inks why not try out. The closing date is August 28th

Click the link below to find out more -
 
 Anyway onto my Tiddly Inks Fab Friday Design Team creation for you - I used this pretty little digital stamp called 'Wryn-Somebunny To Love You' (which also includes the sentiment). Don't you just love those little bunnies....they're seriously cute!


Here's What I Did
1 used a 5" x 7" card base which I matted with some patterned paper.  I then stamped my image and sentiment onto some white colouring card, and using a curved border die I cut across it. The image was coloured using Copic pens and was attached to the base card along with the top section.

To finish off I added a large die cut flower with a glittered up button on top, then glued a few mini die cut flowers around the image and the sentiment.

Here's what I Used
Digital Image: 'Wryn-Somebunny To Love you' from the Tiddly Inks store (there is also a clear stamp set available too - http://www.tiddlyinks.com/somebunny-clear-stamp-set-3x4/)
Copics - Skin - E0000, E000, E00, E11, R20 / Hair - YR0000, YR000, YR00, E57, E79 / Rabbits & Rabbit Ears - E35, E50, E51, E53, E57, R20, R22, R27, R000, R00 / Dress & Shoes - R000, R00, R20, R22, R27, R37, C1, C3 / Ground - BG10, BG15
Dies: Simon Says Stamp 'A2 Card Curved Edge', Creative Expression 'Camellia-Complete Petals', MFT Die-namics 'Blueprint 14'
Paper/Card (CS): White Card Base, Neenah Colouring CS, Brown Bazzill  CS, First Edition 'Spring Drop', Glitter CS
Other: Serif CA2, Glitter, Bakers Twine, Punch

Make sure you pop over to Tiddly Inks blog to see what my other fab teamies have created for you today -- click on the logo below:
 
http://www.tiddlyinkschallenge.blogspot.co.uk/
 
Pssst, don't forget to join in with our fun 'Paws For Thought' challenge. So why not grab your Tiddly Inks image and join in  with us - click here to enter.

Hugs

Janine
xxx

Tuesday 11 August 2015

Handmade Bliss Inspiration Card - Smarty Cat

-- Good morning everyone --
 
Hellooo, I'm here again showcasing one of my card using some of the many products you can find in the Handmade bliss store - check out the link below.

This week I decided to play with this gorgeous little character from Stamping Bella, it's called 'Smarty Cat'....don't you just love the glasses lol. I made her into a purrfect girly cat but you could quite easily made her into a Tom. All the Stamping Bella stamps are pre-mounted and stamps beautifully and cleanly.  


If you click on the link further down it will take you straight to the stamp. But why not check out
 the rest of the Stamping Bella collection and all the other fabulous American stamps and dies by click on the logo below.. 
 
http://www.handmadebliss.co.uk/home/4588338105
 
 Here's What I Did
I used a 5" x 5" scalloped card base which I matted with some blue card and patterned paper.  I stamped my images and the sentiment onto some white colouring card, and then using a Copic Fineliner pen I joined the ball of wool to the sentiment.  The scene was then die cut into a circle along with a blue mat. I coloured the image with Copic pens and added a little distressing ink for the sky. A border strip was made from blue card using a punch and die and this was attached to the card base along with the coloured topper.

To finish off I added a stamped out tag, glossy accents to the cat's glasses and a few pearls at the bottom of the card.
 
Here's What I Used
 
Other items used are from my crafty stash:
White 5" x 5" scalloped card base, Crealies XXL 'Stitched Circle' die, LOTV paper pad and tag stamp, Copic pens, pearls, distressing Inks, Bakers Twine, Glossy Accents, Copic fineliner pen.

If you would like to know more about the products or Copics pens colours I used please leave me a message in your comment, and I will get back to you. Make sure you include your email address in your message.
 
Don't forget our challenge
The theme this month is easy peasy, it's 'Anything Goes', just make a card using one or more of the products in the shop (you don't need to have bought it from there either). So come on and join in, we'd love to see you. To enter go to our blog here.

I can't wait to see your makes! And oh yes, why not leave me a message :)
 
Hugs
 
Janine x

Wednesday 5 August 2015

Sugar Nellie - Autumn Girl

- Hello Sugar Fans -
Yoo hoo, it's good to see you again! Well it's Wednesday and Sugar Nellie day, and my turn to share a card with you.  So this week I thought I would make something very girly and glittery for you. This gorgeous 'All Dressed Up' stamp is called 'Autumn Girl' and she's available as a digital stamp from Funkykits.  I just think she's gorgeous, there's more of the 'All Dressed Up' digital stamps available to download in store. 


Here's What I Did
I used a 6" x 6" scallop card blank and matted it with deep blue card. I printed my image directly onto my colouring cardstock and I coloured it with Copic Markers, to add a little background I added various sized dots and added some sequins.
I then die cut 2 frames and 2 mounts in both blue and pink CS and layered them up. Using the left over squares from the frames I adhered some doubled sided sticky paper to them and die cut some flowers and leaves. I peeled off the backing paper and added some crystal glitter - these were added to my frames as embellishments. To finish off I added a few gems.

Here's What I Used
Digi Stamp: 'Autumn Girl' All Dressed Up digital stamp available from Sugar Nellie at Funkykits
Paper/Cardstock (CS): Craftwork Super Smooth Digital CS, Topsy Turvy CS, Double Sided
Adhesive Paper
Copics: Skin: E0000, E000, E00, E11, E02 / Lips, Top & Ribbon - R81, R85, RV34 / Skirt - B0000, B00, B02, B45 / Hair - YR0000, YR000, YR00, E13, E18, E99
Dies: Tonic Square Layering Dies, MFT Die-namic 'Flower Trio & Leaves
Other: Glitter, Sequins, Gems

Don't forget if you want to see more Sugar Nellie creations made my lovely teamies why not drop by the Sugar Nellie blog or join our Facebook page (just search for the Official Sugar Nellie Group).

Why not join in with the challenge over at the Sugar Bowl - there's still  time to enter with a great prize up for grabs. The theme this month is 'Anything Goes' so it's really easy. DON'T FORGET TO ENTER THE CHALLENGE YOU MUST USE a Sugar Nellie stamp. 
I look forward to seeing you soon. Why not leave me a message so I know who's out there - I'd love to hear from you!!

Challenge Entered:
 
Hugs & kisses
x Janine x

Tuesday 4 August 2015

Tiddly Inks Challenge - Paws For Thought!

 - Good Morning Tiddly Inkers -

Hi everyone, I'm here to share my Design Team card with you for this week's Tiddly Inks Challenge #163. Our fab theme this week is 'Paws For Thought!' so grab your Tiddly Inks animal stamp (anything that has paws of course!) and join in with us.

For my card this week I used the gorgeous digital stamp called Wryn - Thank You Beary Much (grab it now it's only a $1 in the store). I've been dying to use it in a project for ages and well I thought teddies have paws so this theme is perfect.

I couldn't resist paper piecing her comfy chair and decoupaging everything else....I really wanted the teddies and Wryn to pop. I won't lie it did take me a while to print, colour and cut everything out, but I'm really happy with the result. I hope you like it :)


Here's What I Did
I used a 7" x 7" white card base which I matted with lilac card. Using my computer software I printed the image 4 times directly onto my colouring card stock, coloured sections I needed with Copic pens then fussy cut them all out.  The full image was printed again onto 2 different patterned papers and cut out. All the pieces where glued into page but I added foam tape behind Wryn and one of the bears to give dimension, to bring the bears to life I used glossy accents on their eyes and noses.

The finished panel was glued to a die cut scalloped square and added to the card base using foam pads. To finish off I added a touch of glitter and a few stamped and die cut paw prints, along with a die cut heart.

Here's what I Used
Digital Image: Wryn - Thank You Beary Much from Tiddly Inks
Stamp: MFT Die-namics  'From My Heart'
Cardstock (CS): Lilac, Aqua & Purple CS, Neenah Colouring CS, LOTV 'Promises' Paper Pad
Copics:  Skin - E0000, E000, E00, E11, R20 / Hair - X1, C2, C3, C5, C7, 100 / Bears & Chair Legs - E00, E11, E15, E21, E25. E29 / Shading - V00, V01, V04, BG000, BG10, BG13 / Ground - W1
Dies: Crealies XXL 'Stitched' Square, MFT Die-namics 'From My Heart', Memory Box 'Cross Stitched Hearts', Spellbinders Grand 'Scallop Squares'
Other: Craftartist 2, Wink Of Stella 'Clear Glitter' Pen, Glossy Accents

I hope you'll drop by the Tiddly Inks Challenge Blog to take a peek at what the other lovely Design Team ladies have come up with. I look forward to seeing what you make :)

Click on the logo below:-
http://tiddlyinkschallenge.blogspot.co.uk/
 Hugs
Janine
xxx

Saturday 1 August 2015

Handmade Bliss Challenge #4

Good morning everyone
 
Well it's the 1st of the month and which means it's challenge time over at Handmade Bliss. So here's my Design Team card for you today - our theme this month is a really easy one, it's 'Anything Goes'.
 
To enter you must use a product or products that is stocked in the Handmade Bliss store (even if you didn't actually buy it from there). We would appreciate it you could let us know in your blog post which product/s it is in please. To enter, go to our blog here and upload your make there.


http://www.handmadebliss.co.uk/shop/4588358199
 
Handmade Bliss shope stock lots of fabulous American brands such as My Favourite Things, Stamping Bella, Altenew, Doodlebug Designs, Taylored Expressions, Avery Elle etc, with more big names coming soon. Joanne (the store owner) also plans to stock USA brands that are new to the UK, so make sure you keep checking her store and this space of course. ;)

Here's What I Did
I used a cut down sheet of A3 card for my white card base which I matted and layered with patterned paper. Using another piece of the white card I die cut it into a rectangle and then die cut into the centre using an oval die to create a frame. I laid the frame onto my patterned paper and stamped my image on top and removed the frame (this was for placement later).

The image was stamped again onto colouring card stock, coloured with Copic pens and fussy cut out. I die cut a selection of clouds borders from vellum and glued these behind my frame and added the frame to my card base. I attached the girl and balloons to the card directly over the top of the stamped image that I did earlier, I used foam tape behind the top of the balloons to add a little dimension.

To finish off I added white dots and clear glitter to some of the balloons, scattered a few sequins around the sky and added a few gloss dots at the corners.

Here's What I Used
 

Other items used are from my crafty stash: White Card, LOTV Patterned Paper, Vellum, White Pen, Wink Of Stella Clear Glitter Pen, Foam Tape, Copic Pens, Sequins, Crealies XXL Dies, Crystal Gloss Dots.

If you would like to know the Copic colours I used, please leave me a message in the comment box along with your email address and I will get back to you.
 
So come on what are you waiting for, we'd love to see your card/project in in our Anything Goes Challenge (but remember the rules).,,,and there's a great prize for the winner too. Click here to go to our blog and enter - while you're there don't forget to check out what my teamies have created to inspire you.  Oh yes, and don't forget to visit the store too!!!

Why not leave me a message and let me know what you'd like to see stocked in the store :)
Hugs
x Janine x