Wednesday 24 June 2015

Sugar Nellie Revisited

- Hello Sugar Fans -
Good morning to you all.
Anyhoo, it's Wednesday and Sugar Nellie day.  So this week I thought I would start and revisit some of my older projects using some of my favourite Sugar Nellie stamps.
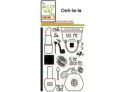
This one is a tag is one of the very first things I made officially for Sugar Nellie. the stamp I used is called Carnival Balloon and its available from Funkykits as a both rubber stamp and as a digital stamp. 
 

Here's What I Did
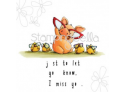
I made the tag myself, basically it's a rectangular piece of white card with a shaped top made by using a spellbinder die. The background was made with distressing inks, stamped flowers and words with a splash of glitter. It's hard to see but the stamped flower petals have had their colour removed - just by using a damp brush and a piece of kitchen roll.   I printed this gorgeous girl out 4 times, then coloured certain section of her in with Copics and Prisma pencils, and cut out them out and layered her up. The doily edge was made with an XCut border punch that I only bought the other day - it's so dainty and pretty.
Here's What I Used
Digi/rubber Stamp: Carnival Balloon from Funkykits
Copics: Skin - E0000, E000, E00, E01, E13, R20 / Hair - YR0000, E000, E13, E99, E37 / Purple Skirt & Socks - BV000, BV00, BV02, BV04, BV25 / Pink Dress - RV000,/ RV00, RV13, RV34, RV69 / Shoes/Belt - YR0000, YR000, YR00, E13 /Eyes - RV0000, RV00, RV13 / Flowers - RV000, RV00, RV13 / Balloons - RV000, RV00, RV02, RV13, RV34, BV000, BV00, BV02, RV04
Distressing Ink: Dusty Concord, Worn Lipstick, Tumbled Glass
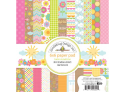
Background Stamp: My Minds Eye 'Tangerine 'Hello'
Border Punch: Xcut (don't know the name)
Die: Crafts-Too Frame 6
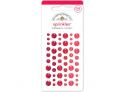
Other: Crystal Glitter, Ribbon (bought by my sweet daughter who paid a fortune for it in a London store), Gems, Buttons, Bakers twine
Don't forget if you want to see more Sugar Nellie creations made my lovely teamies why not drop by the Sugar Nellie blog or join our Facebook page (just search for the Official Sugar Nellie Group).

Why not join in with the challenge over at the Sugar Bowl - there's still  time to enter with a great prize up for grabs. The theme this month is 'Anything Goes' so it's really easy. DON'T FORGET TO ENTER THE CHALLENGE YOU MUST USE a Sugar Nellie stamp. 
 
I look forward to seeing you soon. Why not leave me a message so I know who's out there - I'd love to hear from you!!

Challenge Entered:
 
Hugs & kisses
 
x Janine x

Tuesday 23 June 2015

Tiddly Ink Challenge #160 - Let Get Gothic!!

 - Good Morning Tiddly Inkers -

So, onto my Design Team project for this week's Tiddly Inks Challenge #160, our fabulous theme this week is 'Gothic'.....mwah!!! For a change I thought I would make a tag, so for my take on 'goth' I used 2 digital stamp called Alison The Witch and Twisted Tree (inc Moon) and layered then up on my tag and patterned paper. 

Mmm, I'm not sure if I'm more Halloween than Gothic. What do you think??


Here's What I Did
I decided to make a tag for the Gothic theme this week - so I drew around it onto grey patterned paper to create my shape and cut it out. Next I inked around the edges using black and purple distressing inks, and added stars using a stencil, the dots were added with a white pen and a moonlight yellow pen. The finished paper was then glued to the front of the tag.

I printed off the Twisty Tree, Moon and Alison the Witch directly onto colouring card stock and coloured them with Copic pens, these were then fussy cut out and the fence, grass and stars were all die cut. I glued everything into place on the tag but added foam tape to Alison to give a little dimension. To finish off I added a black lace bow and clear glitter pen plus some white and yellow pen detail on certain areas on the tag.

Here's what I Used
Digital Image: Alison The Witch and Twisted Tree (inc Moon) from Tiddly Inks
Cardstock (CS): Black & Purple CS, Yellow Glitter CS, Neenah CS, Hobbycraft 'xxx' Paper Pad
Copics: Skin - E000, E00, E11, R20 / Hair - YR0000, YR000, YR00, YR02, E13, E37, E99 / Hat & Dress - C0, C1, C2, C3, C5, C7, V01, V04, V09, V012 / Tree - V01, V04, V05, V09, V012 / Moon - Y02, Y08
Dies: Marianne Designs 'LR0205', Cuttlebug 'Snowflakes #2', Taylor Expression 'Wispy Grass Border'
Other: White Pen, Yellow 'Moonlight' Pen, Clear Glitter & Gold Pens, Memory Box 'Star Starry Nights' Stencil, 'Black Soot' & 'Dusty Concord' Distressing Ink, Dekromount 'Tag', Craftartist 2, Black Lace

I hope you'll drop by the Tiddly Inks Challenge Blog to take a peek at what the other lovely Design Team ladies have come up with. I look forward to seeing what you make :)

Click on the logo below:-
http://tiddlyinkschallenge.blogspot.co.uk/
 Hugs
Janine
xxx

Friday 19 June 2015

Tiddly Inks - Fabulous Friday

Hello and good morning everyone -----

Here is my Tiddly Inks Design Team card for Fabulous Friday. I've used one of Christy's new digi release called Magical Friendship, I just think this is such a pretty image and would be ideal for a friend or sister's birthday etc.

I decided to create an out of the frame picture card for something slightly different, so the mermaid is inside the frame whereas her friend is laying outside it.


Here's What I Did
I used an 6" x 6" square card base which I matted and layered with lemon hammered card. The mermaid scene and sentiment/layout was printed directly onto my colouring card stock twice, and once onto printing paper which was then fussy cut out - this was used for my mask. I die cut one of the scenes into a square and covered the images up with the paper mask, then using a cloud border and some distressing ink I created my background sky. The whole scene and friend was coloured with Copic pens and the friend was then fussy cut out. 

Using 2 square dies I created a frame from white card, this was then added to my card base. The finished mermaid scene was glued inside and the friend was added to the outside of the frame using foam tape and overlapping slightly into the framed section.  To finish off I added a touch of glitter and a few gems.

Here's what I Used
Digital ImageMagical Friendship by Tiddly Inks
Copics: MERMAID --- Skin - E0000, E000, E00, E11, R20 / Hair - YR000,0, YR000, YR00, E13, E25, E99 / Top & Tail - BG09, BG10, BG13, BG15, BG23,/ Starfish - Y000, Y00, Y02, Y08
FRIEND - Skin - E0000, E000, E00, E11, R20  / Hair - C0, C2, C3, C5, C7, 100 / Outfit - Y000, Y00, Y02, Y08 / Grass & Bank - YG05, YG06, YG11, YG17, E33, E35, E37 / Ocean - B000, B00, B02, B05
Dies: Crealies XXL 'Stitched Dies', Taylored Expressions 'Cloud Border'
Paper/Card (CS): White Card Base, Lemon & White CS, Neenah CS
Other: Serif CA2, Distressing Ink - Tumbled Glass, Glitter, 'Clear' Wink Of Stella Pen, Gems, White Pen

Why not pop over to Tiddly Inks to see what my other fab teamies have created for you today -- click on the logo below:
 
http://www.tiddlyinkschallenge.blogspot.co.uk/
Hugs

Janine
xxx 

Thursday 11 June 2015

Handmade Bliss - Inspiration Card

-- Good morning everyone --
 
Hellooo, I'm here again showcasing my card using some of the products you can find in the Handmade bliss store - you can find the list below. The Alley Way stamp set I used is called 'Ooh La La', it's brilliant for a girly card.
 
 http://www.handmadebliss.co.uk/shop/4588358199


Here's What I Did
I cut down an A4 sheet of black card and scored it in half to create my base. The bottom corners were rounded off and I attached a piece of wide red ribbon around the bottom portion of the card.

Next I stamped lipsticks 4 times onto colouring cardstock and coloured them with Copic pens, which I then cut out. The ends of the lipsticks were glittered - 3 in silver and 1 in red. I die cut a rectangle using a stitched edged die, and attached the lipsticks using foam tape to create a little dimension. I stamped my sentiment and added glitter dots. The completed topper was then matted and layered onto black and red card, and added to my card base.

Note: If you prefer you can also buy SVG files direct from the TAW store, which will allow you to cut out the stamp elements using an electronic cutting machine.
 
Here's What I Used
 
 
Other items used are from my crafty stash: Black, Red, White Card, Mama Elephant Die, Silver and Red Glitter Pen, Copic Pens, Foam Pads, Red Ribbon, Corner Rounder
 
Don't forget our challenge
The theme this month is 'Colour Swatch' which makes it nice and easy, so come and join in. To enter go to our blog here.

I can't wait to see your makes! And oh yes, why not leave me a message :)
 
Hugs
 
Janine x

Wednesday 10 June 2015

Sugar Nellie Design Team Card - Full Of Grace

- Hello Sugar Fans -
Well hello and good morning to you all.
Wow, this weather is so changeable at the moment - I don't know about you, I don't know if to wear my winter coat and boots or my shorts and sandals. It's just crazy!!!
Anyhoo, it's Wednesday and Sugar Nellie day.  So this week I thought I would make something really girly and pretty for my Sugar Nellie card today. This gorgeous 'All Dressed Up' stamp is called Full Of Grace and she's available as a digital stamp from Funkykits.  I just think she's just so beautiful, there's more of the 'All Dressed Up' digital stamps to download and collect too....so definitely check them out.


Here's What I Did
I used a 6" x 6" scallop card blank and matted it with patterned paper. I printed my image directly onto my colouring cardstock and I coloured her with Copic Markers, to add a little background noise I added various sized dots around the image using the same colours.
I then die cut 2 frames and 2 mounts in both blue and pink CS and layered them up. Using the left over squares from the frames I adhered some doubled sided paper to them and die cut some flowers and leaves. I peeled off the backing paper and added some crystal glitter - these were added to my frames as embellishments. To finish off I added gems, glitter and a few sequins.

Here's What I Used
Digi Stamp: 'Full Of Grace' All Dressed Up digital stamp available from Sugar Nellie at Funkykits
Paper/Cardstock (CS): Craftwork Super Smooth Digital CS, Topsy Turvy CS, Double Sided
Adhesive Paper, Hobbycraft 'Elegance' Paper Pad
Copics: Skin: E0000, E000, E00, E11, E02 / Lips, Top & Ribbon - R81, R85, RV34 / Skirt - B0000, B00, B02, B45 / Hair - YR0000, YR000, YR00, E13, E18, E99
Dies: Tonic Square Layering Dies, MFT Die-namic 'Flower Trio & Leaves
Other: Glitter, Sequins, Gems

Don't forget if you want to see more Sugar Nellie creations made my lovely teamies why not drop by the Sugar Nellie blog or join our Facebook page (just search for the Official Sugar Nellie Group).

Why not join in with the challenge over at the Sugar Bowl - there's still  time to enter with a great prize up for grabs. The theme this month is 'Anything Goes' so it's really easy. DON'T FORGET TO ENTER THE CHALLENGE YOU MUST USE a Sugar Nellie stamp. 
I look forward to seeing you soon. Why not leave me a message so I know who's out there - I'd love to hear from you!!

Challenge Entered:
All Dressed Up Challenge #26 - Anything Goes

Hugs & kisses
x Janine x

Tuesday 9 June 2015

Tiddly Inks Challenge #159 - Super Power

 - Good Morning Tiddly Inkers -

So, onto my Design Team card for this week's Tiddly Inks Challenge #159, our fabulous theme this week is 'Super Power'. This is such a cool theme.

So for my card I used the digital stamp called Super Pup, Isn't he just the cutest thing ever! I wanted him to look like he was fly over the card, so I used a strip of acetate to make him hang --- and the best thing is that he actually wobbles so he looks like he's really flying, it's so funny. LOL 

Originally I put a sun in the top hand corner, then I changed my mind and decided to make a Superman type badge with a Super Pup logo, I think it's turned out really well.


Here's What I Did
I used a white DL scalloped card base. Next I die cut 3 cloud borders from white card and inked up the edges, I then cut a further 2 borders from vellum. The hills were hand cut from 3 green coloured card and stencilled with ink - one of which I pre-printed with my sentiment. Next I printed out my Super Pup and coloured him with Copics, and cut him out. I then made up the countryside scene on the matted blue and black card making sure I tucked the acetate strip behind it, and attached the whole thing to my card base. The pup was then taped to the acetate strip.

To finish off I created a 'SP' badge using die cut elements, and glued punched out flowers to the grassy hills

Here's what I Used
Digital Image: Super Pup Tiddly Inks
Copics - Pup - W0, W1, W3, W5, R000, R20 / Cape & Cuff - R000, R20, R22, R29, R37, R59 /  Outfit & Belt -  B12, R23, B24, B28, B39, Y02, Y15
Cardstock (CS): Black, Green, White, Blue, Red, Yellow, Neenah Colouring Card, Vellum
Dies: Taylor Expression 'Cloud Border', Tonic Layering 'Circles', Sizzix 'Hexagons', Cuttlebug 'Snowflakes', First Edition 'xxx'
Other: CraftArtist 2, Distressing Inks, Tonic Punch, Hole Punch, Acetate, Simon Says Stamp Stencil 'Falling Hearts' and 'Tiny Dots'

I hope you'll drop by the Tiddly Inks Challenge Blog to take a peek at what the other lovely Design Team ladies have come up with. I look forward to seeing what you make :)

Click on the logo below:-
http://tiddlyinkschallenge.blogspot.co.uk/
 Hugs
 
Janine
xxx

Friday 5 June 2015

Tiddly inks - Fabulous Friday

Hello and good morning everyone -----

Here is my Design Team card for Fabulous Friday over at Tiddly Inks. The gorgeous digital image I used this week is called Poppy Pixie, isn't she the cutest thing ever.  The making of this card coincided with one of my oldest friend's birthday (we've known each other for over 30 years), so this is actually her birthday card as well as my DT card......and she loved it.

To really show off Christy's fabulous drawing I decided to create a CAS card and only use a few colours for the flowers as I wanted to keep a soft and gently look. FYI There are more pixies with flowers in the Tiddly Ink store - why not check them out.


Here's What I Did
I used an A5 scalloped card base which I matted and layered with lilac card. The image and sentiment/layout was printed directly onto watercolour card using my software. The image was then water coloured with Derwent Inktense pencils. To finish off I added a touch of glitter and a sprinkling of sequins.

Here's what I Used
Digital ImagePoppy Pixie by Tiddly Inks
Inktense Pencils: Skin - Baked Earth, Saddle Brown, Cadmium Pink / Hair - Saddle Brown / Dress- Tangerine, Poppy Red / Leaves - Apple Green, Spring Green /  Daisies - Red Violet, Iris Blue, Cadmium Yellow / Lavender - Fuchsia / Poppies & Small Bell flowers - Cadmium Yellow, Golden Yellow, Cadmium Orange, Tangerine / Ladybird (Bug) -  Poppy Red / butterflies - Tangerine, Iris Blue, Poppy Red / Fluffy Flowers - Tangerine / Background - Tumbled Glass (Distressing Ink)
Paper/Card (CS): White Scalloped Card Base, Lilac CS, Watercolour CS
Other: Serif CA2, Sequins, Glitter, 'Clear' Wink Of Stella Pen

Why not pop over to Tiddly Inks to see what my other fab teamies have created for you today -- click on the logo below:
 
http://www.tiddlyinkschallenge.blogspot.co.uk/
Hugs

Janine
xxx 

Monday 1 June 2015

Handmade Bliss Challenge #2 - Colour Swatch

Good morning everyone

I'm here to share my Handmade Bliss Design Team challenge card with you today - our theme this month is 'Colour Swatch'. To enter you must use 2/3 colours from the swatch shown below and make a card/project using any product or products that is stocked in the Handmade Bliss store (even if you didn't actually buy it from there). We would appreciate it you could let us know which product/s it is please. To enter, go to our blog here and upload your make.

 
For my challenge card I've used one of the fabby Stamping Bella stamps called 'Nice To See You Petunia'  I'm so in love with Stamping Bella stamps and the new June release are just fabulous, and they're coming soon to Handmade Bliss. Yay!!!


http://www.handmadebliss.co.uk/shop/4588358199
 
 Here's What I Did
I used a 6" x 6" white card base which I matted and layered with 2 different patterned papers. I then stamped my piggy image and grass onto some colouring card and die cut it into a circle. To allow me to create the cloudy sky without colouring over the images I made masks for all creatures - this was done by stamping the whole image again onto copier paper and cutting everything out. Using removal tape I placed all the masks on top of the creatures and coloured the sky using my cloud cut out and distressing ink. When the sky was dry I coloured everything else with Copics and added glossy accents to the spectacle lens.

The finished picture was glued onto a die cut scalloped circle and attached to the card base. To finish off I added a die cut flower, leaves and a sentiment tile.

Here's What I Used
 

Other items used are from my crafty stash: White Card Base, Blue, Yellow, Teal Card, Grass Stamp, Stitched Circle Dies, MFT Dies, Foam Pads, Distressing Ink, Glossy Accents, Ribbon, Button. Sentiment Tile, Copics (if you need to know the colours I used just message me and I'll send you the list - make sure you include your email address).
 
So come on what are you waiting for, we'd love to see your card/project in in our Colour Challenge (but remember the rules). And there's a great prize of for the winner too. Click here to go to our blog and enter.  Oh yes, and don't forget to visit the store too!!!

Why not leave me a message and let me know what you'd like to see stocked in the store :)
 
Hugs
 
x Janine x