Tuesday, 1 February 2022

Lili Of The Valley - Teddies & Roses

Hi everyone

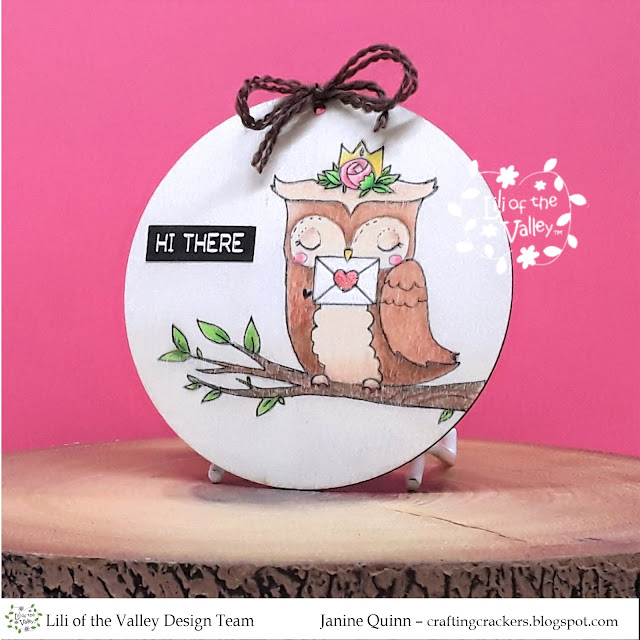
Wow, it's the 1st of February already, where the heck did January go to? It seemed to have blow in and blow right out again. I can't believe we're already onto the 2nd release from Lili Of The Valley. Over the next few days I'll be giving you a sneaky peak of some of the new digi stamps all based around the theme of 'love'. The stamp I've used today is called 'Teddies & Roses' and I've teamed it with a sentiment from an older collection. To add some colour to the images I used Copic pens. The stamps are really sweet and could be used for Valentine's Day, anniversary, engagement/wedding or just to say 'I love you'. There is 20% off everything in the LOTV Etsy store atm, so grab a bargain! I hope you like it. (For sale - £4.50 + P&P - requests by email please)  SOLD

For your information, here is the link to the LOTV Etsy Store to check out all the digi stampsand the LOTV online store to check out the rest of their goodies.


Here's What I Did
A piece of  striped glittery paper was trimmed down slightly smaller than my 6" x 6" card blank, and attached to the card front. A scalloped square die cut from white card was glued flat onto the centre of the card front.  

Using my graphics software I imported the teddy image and sentiment, and resized them both to fit my project. The image was printed out directly onto colouring card stock and die cut with a square die. The image was coloured with Copic pens, then mounted onto a complimentary pink square. Foam was added to the back of the topper and glued to the centre of the card front. To finish off the card I add a heart gem to the top of the card. 

Here's What I Used 
Digi Stamp: Teddies & Roses
Digi Sentiment: Simply Sophisticated

Copics: Teddies - E50, E51, E53, E33, E57 / Boxes - R20, R22, R29, E50, E51, E53 / Roses - R05, R29, TG03, YG17 / Ground - E41, E43

Other: 6" x 6" White Card Blank, Make It Colour Card, Pink Card, White Card, Believe In Magic Paper Pad (First Edition), Indented Stitched Square Die & Indented Square Die (Elizabeth Craft Designs), Stitched Scalloped Square Set (Creative Expressions), Funky Foam, Heart Gem, Glue, Double Sided Tape

If you wish to ask a question about any of my cards please leave me a message in the comment with your email address, otherwise I cannot contact you. Alternatively email me at jsnine.quinn@gmail.com

Or why not join us on social media at  'We Love Lili Of the Valley' Facebook Group run by the Design Team, the official Lili Of The Valley Facebook page and on Instagram.  We'd loved to see you.

Please Note - I am part of the Lili Of The Valley's Design Team and I receive their lovely digi images to play with and share with you; I do not receive any monetary reimbursement for my samples, advertisements or my participation. I do, what I do for fun and relaxation. Thank you. x

Thank you so much for dropping by, and please don't forget to say hi :)  I'll be back soon with more sneaky peeks of the fabulous new LOTV Love stamps. TTFN

Challenges entered:

Hugs

x Janine x

Saturday, 22 January 2022

Lili Of The Valley - Love Letters Owl

Hi there everyone

Today I'm sharing a piece of art I created on a wood slice using one of the new stamps released by Lili Of The Valley last week. The stamp is from the 'Love Letters' collection and I used Prismacolor pencils to colour with. 

Did know, you can stamp your image onto wood using a permanent or waterproof ink like Stazon or Ranger Archival ink; then colour with it whatever takes your fancy eg pencils, Copics and even paints such as watercolour and acrylics etc. However, what's unusual about my piece of art is that I actually used a digi stamp and pencils on wood. I flipped the image, printed it out and coloured it with my pencils. I know crazy eh! After doing lots of research I found a way to do this. You should also be able to use paints if you print out using an Epson printer as their ink is usually water resistant - however, I haven't tried this as I've only got a Canon  Pixma printer atm. Check out below how I did this, then have a go and send me your feedback. Obviously you can use this for any digital stamp. :) 

Please note that as a LOTV Design Team member I was given permission by the company to use the digital version of the image, as the polymer stamp version wasn't available at the time.

For your information, here is the link to the LOTV Etsy Store to check out all the digi stampsand the LOTV online store to check out the rest of their goodies.
Here's What I Did
First I made sure the wood slice was smooth, dry and dust free. Next I imported the owl into my software program and resized it to fit a 4" x 4" circle and flipped it. I printed this onto a piece of copier paper so I knew what the image placement was. I use a top loading printer (it feeds in from the top) and made sure that the image was sited on bottom of the page, meaning it printed out last. This ensured that the plain copier paper would feed into the printer first, which was crucial for the next step. 

Once the image has been printed out I attached a piece of wax paper sufficient to cover the image and tape this in place with removeable tape. I changed my printer setting to 'Photo' printing, and choose the Glossy photo paper option (this ensured that the ink stayed wetter for longer). I put the paper back into the printer ensuring the wax paper was going to be the last thing to print out, and pressed print. 

The next step was crucial, I very carefully removed the wax paper from the copier paper and placed it face down onto the wood slice. I made sure that I did this confidently so as to not move or smudge the image once it was down. Whilst keeping the paper in place with one hand, I carefully pressed and smoothed out the lines of the image (from the centre outwards), I just used my fingers (but I did use an old credit card on another image). Keeping the paper in place I lifted a corner of the paper to check everything was ok, as the transfer only takes a few seconds. Once I was happy with everything I removed the wax paper. I wiped over the surface of paper with a paper towel just to make sure there was no ink residue left, as this can be reused again, and again. The image instantly dried onto the wood, so I coloured the image in using my pencils. To finish off  I added a little glitter to the heart, a printed out sentiment and a little bow. FYI - if I was planning on giving this away I would probably spray it with varnish to protect it. 

If I get enough requests I will create a proper handout using this method. :)

Here's What I Used 
Polymer Stamp:  Love Letter Collection
Digital Sentiment: Embossed Labels

Prismacolor Pencils: Owl - Bunt ochre, Sienna Brown, Light Umber, Blush Pink, Pink, Beige / Flowers & Crown - Blush Pink, Pink, Canary Yellow, Yellowed Orange, Spring green, Olive Green, Envelop - White, Blush Pink, Poppy Red / Branch - Light Umber, Spring Green, Olive Green   

Other: 4" x 4" Wooden Slice, Wax Paper, Copier Paper, White Card, Glitter, Embroidery Thread

Or why not join us on social media at  'We Love Lili Of the Valley' Facebook Group run by the Design Team, the official Lili Of The Valley Facebook page and on Instagram.  We'd loved to see you.

Please Note - I am part of the Lili Of The Valley's Design Team and I receive their lovely digi images to play with and share with you; I do not receive any monetary reimbursement for my samples, advertisements or my participation. I do, what I do for fun and relaxation. Thank you. x

Thank you so much for dropping by, and please don't forget to say hi :)  I'll be back soon with more sneaky peeks of the fabulous new LOTV Spring stamps. TTFN

Challenges entered:

Hugs

x Janine x

Saturday, 8 January 2022

Lili Of The Valley - Love Letter Elephant

Hi everyone

Happy New Year to you all. Let's hope that 2022 is going to be a much better year than the previous 2. Fingers crossed. Anyhow upwards and onwards as they say, for my card today I'm sharing the new polymer stamp sets being released by Lili Of The Valley very soon. The elephant stamp is from the 'Love Letters' collection, and the sentiment badge is from the 'Rainbows' collection. To add some colour to the images I used Copic pens. The stamps are simply fabulous with lots of space to do either flat colouring or adding a little shading, you could also try a little paper piecing. (For Sale - £4.50 + P&P) SOLD

For your information, here is the link to the LOTV Etsy Store to check out all the digi stampsand the LOTV online store to check out the rest of their goodies.


Here's What I Did
I added trimmed down a piece of pretty pink paper slightly smaller than my 6" x 6" card blank, and attached it to the card front. Using my graphics software I created a square with a dotty pink line then printed it out, then die cut with a square die. The elephant was stamped into the centre of the square and coloured with Copic pens, then mounted onto a pink scalloped square. Foam was added to the back of the topper and glued to the centre of the card front. The sentiment badge was stamped, coloured and fussy cut out, and added to the top of the card with a foam pad. 

To finish off the card I add a little glitter to the sentiment, hearts and a few areas of the elephant plus a little gem. 

Here's What I Used 
Copics: Elephant & Decorations - W1, W2, W3, E000, E00 /  Y15, Y17, Y38, RV06, RV27, RV52, RV55, YG01, YG03, YG17 / Hearts & Sentiment - RV06, RV27

Other: 6" x 6" White Card Blank, Make It Colour Card, Pink Card, Bloom & Wild Paper Pad (Craft Consortium), Decorative Nested Square Dies (Craft Buddy), Funky Foam, Gems, Biodegradable Glitter (Docrafts), Glue, Double Sided Tape

Or why not join us on social media at  'We Love Lili Of the Valley' Facebook Group run by the Design Team, the official Lili Of The Valley Facebook page and on Instagram.  We'd loved to see you.

Please Note - I am part of the Lili Of The Valley's Design Team and I receive their lovely digi images to play with and share with you; I do not receive any monetary reimbursement for my samples, advertisements or my participation. I do, what I do for fun and relaxation. Thank you. x

Thank you so much for dropping by, and please don't forget to say hi :)  I'll be back soon with more sneaky peeks of the fabulous new LOTV Spring stamps. TTFN

Challenges entered:

Hugs

x Janine x

Friday, 7 January 2022

Lili Of The Valley - Love Letter Unicorn

Hi there

I'm back again with another Lili Of The Valley beauty from their new collection. For my card today I have used 2 of the new stamps from the Love Letters collection - Unicorn and sentiment 'Birthday Hugs'. I used Copic pens to colour the image. Isn't it just so sweet though, such a gorgeous stamp and perfect for all the little unicorn lovers out there. I hope you like it. x 
(For Sale - £4.50 + P&P) SOLD

For your information, here is the link to the LOTV Etsy Store to check out all the digi stampsand the LOTV online store to check out the rest of their goodies.


Here's What I Did
First I trimmed down some pretty lilac paper to fit my 6" x 6" scalloped card base, leaving a slim border around the edge. 

The cute unicorn and stamped out onto colouring card stock, then coloured it with Copic pens and fussy cut it out. The sentiment was stamped onto white card and die cut into a circle, pale pink ink was added to the centre. When the ink was dry, the circle topper was glued to a lilac die cut scallop mat, then the cut out unicorn was glued in the centre. I added glitter to areas of the unicorn to make it sparkle.

Funky foam was glued to the back of the topper and attached to the centre of the card front. To finish the card I added a few dots around the unicorn with a white gel pen, then added a few pearls on the bottom. 

You can email me at jsnine.quinn@gmail.com if you require more information about how I created this card. 

Here's What I Used
Polymer Stamp: Love Letter Collection - Unicorn and Birthday Hugs

Copics: Unicorn - C0, C1,C2 / Mane & Tail - V12, V15, BV000 / Unicorn Decorations, Saddle & Pole - RV02, RV21, RV52, RV55, B000, B00, B02

Other: 6" x 6" White Scalloped Card Blank, Make It Colour Card, Lilac Card, My Sweet Provence A4 Paper Pad (Lemon Craft), Stitched Scalloped Circle Die Set (Creative Expressions), Spun Sugar Distress Ink, Pearls, Glitter, Funky Foam, Glue, Double Sided Tape

Or why not join us on social media at  'We Love Lili Of the Valley' Facebook Group run by the Design Team, the official Lili Of The Valley Facebook page and on Instagram.  We'd loved to see you.

Please Note - I am part of the Lili Of The Valley's Design Team and I receive their lovely digi images to play with and share with you; I do not receive any monetary reimbursement for my samples, advertisements or my participation. I do, what I do for fun and relaxation. Thank you. x

Thank you so much for dropping by, and please don't forget to say hi :)  I'll be back soon with more sneaky peeks of the fabulous new LOTV Spring stamps. TTFN

Challenges entered:

Hugs

x Janine x

Tuesday, 16 November 2021

Lili Of The Valley - Decorating The Christmas Tree

Hello everyone

Today I'm sharing one of my latest Lili Of The Valley Christmas cards (I know...I've mentioned the dreaded 'C' word again (oops shame on me!). Anyhow, this card was created using one of the Christmas digi stamps released last year called Decorating The Christmas Tree, I think it's super cute, and it was such a pleasure colour up. I used Copic pens to colour everything. As always I hope you like it. x (For Sale - £4.50 + P&P - email me for information)

For your information, here is the link to the LOTV Etsy Store to check out all the digi stampsand the LOTV online store to check out the rest of their goodies.
Here's What I Did
I added trimmed down a piece of Christmas patterned paper slightly smaller than my 6" x 6" card blank and attached it to the card front. Using my graphics software I imported the sweet tree decorating group, and resized it to fit my rectangle die. I coloured the image using Copic pens. I adhered the die cut sentiment 'Believe' onto the front of the card (I die cut it 3 times from red card and glued them together). Around the image and sentiment I placed die cut snowflakes cut from white glitter card.

The image was then matted onto a red die cut rectangle, then funky foam was added to the back. The completed topper was glued to the centre of the card front. To finish off the card I add a little glitter and a few pearls

You can email me at jsnine.quinn@gmail.com if you require more information about how I created this card. 

Here's What I Used 

Copics: Tree - YG01, YG03, YG17, YG67, E29 / Rabbit - R30, 10, W1, W3, W5 / Owl - E31, E33, E35, B000, Y15, Y17 / Reindeer - E31, E33, E34, E35, E37 / Mice - E50, E51, E53, E57 / Robin - E31, E33, E35, R05, R30 / Fox - E000, E08, E13, E15, E18, E51, E51 / Baubles - R14, R17, B14, Y17, Y38, BG13, BG15, V04, V05 / Snow - B0000, B000

Other: 6" x 6" White Scalloped Card Blank, Make It Colour Card, Red Card, White Glitter Card, Old Christmas Paper Pad (Unknown), Cherish The Moment Dies (Tonic), Sentiment from Festive Frames - Snowball Die Set (Creative Expressions), Mini Snowflake Dies (Lawn Fawn), Pearls, Glitter, Glue, Double Sided Tape

Or why not join us on social media at  'We Love Lili Of the Valley' Facebook Group run by the Design Team, the official Lili Of The Valley Facebook page and on Instagram.  We'd loved to see you.

Please Note - I am part of the Lili Of The Valley's Design Team and I receive their lovely digi images to play with and share with you; I do not receive any monetary reimbursement for my samples, advertisements or my participation. I do, what I do for fun and relaxation. Thank you. x

Thank you so much for dropping by, and please don't forget to say hi :)  I'll be back soon with more sneaky peeks of the fabulous new LOTV Spring stamps. TTFN

Challenges entered:

Hugs

x Janine x

Wednesday, 3 November 2021

Lili Of The Valley - You Are My Sunshine

  Hi everyone

Today I'm sharing one of my latest cards using one of the sweet bear digi stamps from Lili Of The Valley. The stamp I've used is called 'You Are My Sunshine' and I used Copic pens to colour with. This is such a gorgeous stamp and looks amazing with different coloured flowers. I hope you like it. x 

For your information, here is the link to the LOTV Etsy Store to check out all the digi stampsand the LOTV online store to check out the rest of their goodies.

Here's What I Did
I added trimmed down a piece of pretty pink patterned paper slightly smaller than my 6" x 6" card blank and attached it to the card front. Using my graphics software I imported the sweet little bear and added a typed sentiment, then resized them both. I die cut the image with a square die. I coloured the image using Copic pens. Foam was added to the back of the completed topper and glued to the centre of the card front. To finish off the card I add a little glitter to the flowers. 

Here's What I Used 
Digital  Stamp:  You Are My Sunshine

Copics: Bear - E31, E33, E34, E35, E37 / Butterfly - B000, B00, B04 / Flowers - RV000, RV02, RV10, RV23, RV34, Y15, Y38 / Leaves - YG012, YG03, YG17, YG63, YG67

Other: 6" x 6" White Card Blank, Make It Colour Card, Pink Card, Country Meadow Paper Pad (LOTV) Decorative Nested Square Dies (Craft Buddy), Funky Foam, Glitter, Glue, Double Sided Tape

Or why not join us on social media at  'We Love Lili Of the Valley' Facebook Group run by the Design Team, the official Lili Of The Valley Facebook page and on Instagram.  We'd loved to see you.

Please Note - I am part of the Lili Of The Valley's Design Team and I receive their lovely digi images to play with and share with you; I do not receive any monetary reimbursement for my samples, advertisements or my participation. I do, what I do for fun and relaxation. Thank you. x

Thank you so much for dropping by, and please don't forget to say hi :)  I'll be back soon with more sneaky peeks of the fabulous new LOTV Spring stamps. TTFN

Challenges entered:

Hugs

x Janine x

Monday, 27 September 2021

Lili Of The Valley - Christmouse Carols

 Hi everyone

Today I'm sharing one of my latest cards using the fabulous new digi stamps from Lili Of The Valley's 2nd Christmas launch. The stamp I've used is called 'Christmouse Carols' and the sentiment is from the 'Cute Christmas' collection. I used Copic pens to colour with. I hope you like it. x (For Sale - £4.50 + P&P - email me for information)

For your information, here is the link to the LOTV Etsy Store to check out all the digi stampsand the LOTV online store to check out the rest of their goodies.


Here's What I Did
I added trimmed down a piece of Christmas patterned paper slightly smaller than my 5" x 7" card blank and attached it to the card front. Using my graphics software I imported the super cute mice and sentiment, then resized them both to fit my rectangle die. I coloured the image using Copic pens. 

I added a few die cut shapes to the right hand side of the rectangle to add a little extra detail. The completed image was then matted onto a blue and white die cut rectangles. The completed topper was glued flat to the centre of the card front. To finish off the card I add a little glitter and a gem. 

You can email me at jsnine.quinn@gmail.com if you require more information about how I created this card. 

Here's What I Used 
Digital  Stamp: Christmouse Carols
Digital  Sentiment: Cute Christmas

Copics: Mice - E31, E33, E34, E35, E37, E50, E51, E53, E57, R20, R30 / Ground - B0000, B000 / Hats & Robes - B000, B24, B32, B63, B95, B97, C0 / Lantern - Y00, Y15, E51, E53 / Hymn Books - E51 / Sky - B0000, B000, B00

Other: 5" x 7" White Scalloped Card Blank, Make It Colour Card, Blue & White Card, 'Snowy Christmas' 12" x 12" Paper Pad (The Works), Blue Glitter Card, 5" x 7" Mat & Layer Dies (Gemini), Blueprint Die Sets (MFT), Snowflake Frame & Snowflake Dies (Sweet Dixie), Mini Snowflake Dies (Lawn Fawn), Gem, Glitter, Glue, Double Sided Tape

Or why not join us on social media at  'We Love Lili Of the Valley' Facebook Group run by the Design Team, the official Lili Of The Valley Facebook page and on Instagram.  We'd loved to see you.

Please Note - I am part of the Lili Of The Valley's Design Team and I receive their lovely digi images to play with and share with you; I do not receive any monetary reimbursement for my samples, advertisements or my participation. I do, what I do for fun and relaxation. Thank you. x

Thank you so much for dropping by, and please don't forget to say hi :)  I'll be back soon with more sneaky peeks of the fabulous new LOTV Spring stamps. TTFN

Challenges entered:

Hugs

x Janine x

Sunday, 26 September 2021

Lili Of The Valley - Yule Dog

Hi everyone

Today I'm sharing one of my latest cards using the new digi stamps from Lili Of The Valley's 2nd Christmas launch. The stamp and sentiment I've used is called 'Yule Dog', and I used Copic pens to colour with. I hope you like it. x (For Sale - £4.50 + P&P - email me for information)

For your information, here is the link to the LOTV Etsy Store to check out all the digi stampsand the LOTV online store to check out the rest of their goodies.


Here's What I Did
First I added trimmed down a piece of patterned paper slightly smaller than my 6" x 6" card blank, to leave a slim border around the edge. I inked around the edges of the paper using blue distress ink and attached to the card front.

Using my graphics software I imported the cute little doggie and sentiment, then resized them both to fit my square die. The image was printed out again onto masking paper, and fussy cut out leaving a large section beneath the dog for the snowy area. I covered over the little doggie and added a little blue distressing inks to the sky. When the ink was dry I coloured the image using Copic pens and added a few squiggles to the sky with a few blue Copic pens for interest. Using a white pen I added dots to the sky for snow. 

I added die cut shapes to the left hand side of the square to add a little extra detail. The completed image was then mounted on a red scalloped square, and funky foam was added to the back. The topper was added to the centre of the card front. To finish off the card I add a little glitter and a gem. 

You can email me at jsnine.quinn@gmail.com if you require more information about how I created this card. 

Here's What I Used
Digital  Stamp: Yule Dog
Digital  Sentiment: Cute Christmas Collection

Copics: Dog - E31, E33, E34, E35, E37 / Ground - B0000, B000 / Hat - R05, R17, R27, R37, B0000, B000 / Holly, Berries & Flower - YG03, YG17, YG67, R05, R14, R27, R37, Y17 / Snow - B0000, C1 / Sky - B0000, B000, B00

Other: 6" x 6" White Card Blank, Make It Colour Card, Red & White Card, 'Snow Princess' Paper Pad (LOTV), Distress Inks (Tumbled Glass), Christmas Countdown Dies (Hunkydory), Scalloped Square Die (Spellbinder), Pierced Square Die (Crealies), Tag Die (Papercraft Essential Freebie), Sentiment Strip Die (MFT), Snowflake Frame & Snowflake Dies (Sweet Dixie), Blue Texture Paper (Tonic), Christmas Paper Scraps, Red Glitter Card, Gem, White Pen, Glitter, Funky Foam, Masking Paper, Glue, Double Sided Tape

Or why not join us on social media at  'We Love Lili Of the Valley' Facebook Group run by the Design Team, the official Lili Of The Valley Facebook page and on Instagram.  We'd loved to see you.

Please Note - I am part of the Lili Of The Valley's Design Team and I receive their lovely digi images to play with and share with you; I do not receive any monetary reimbursement for my samples, advertisements or my participation. I do, what I do for fun and relaxation. Thank you. x

Thank you so much for dropping by, and please don't forget to say hi :)  I'll be back soon with more sneaky peeks of the fabulous new LOTV Spring stamps. TTFN

Challenges entered:

Hugs

x Janine x

Friday, 17 September 2021

Craft Consortium - Midnight Flight Collection

Hi everyone

Today I'm delighted to share my latest Craft Consortium projects with you using the brand new collection 'Midnight Flight' (in partnership with Melissa Lowry). It's dark and opulent tones are just stunning and perfect for any time of the year, especially autumn. I've made 4 cards using the beautiful 12" x 12" papers, enamel dots, sequins, wooden embellishments, and the new puffy stickers. 

The collection will launched as samples shared in a Mini You Tube Hop created by my lovely teamies at Craft Consortium. The hop starts today, so please check out the Craft Consortium Network facebook page for details.

This collection and other collections are available from the Craft Consortium's website and good craft retailer's websites. In the USA, it will be distributed by Notions Marketing. You can also go direct to the Craft Consortium's website here and sign up for an update on any future product launches. 


Craft Consortium Product Used
Paper Pad: Midnight Flight 12" x 12" and 6" x 6"

Other Things I Used: 
5" x 7", DL, 6" x 6" White & Black Card Blank, Black, Card (Deep Red, White, Green, Mustard), Gold Glitter Card, Acetate, Enjoy Life & Ornate Circle Die (Craft Consortium - Dienamic), Stitch Bloom Dies (MFT), Mini Blooms Dies (Taylored Expression), Envelope Edger Die (Whimsy Stamps), Stitched Rectangle Scallop Edge Frame (MFT), Ornate Label Die (Hunkydory), Nested Scallop Slim Dies (Lisa Horton),Confetti Pocket Die (Sizzix), Pierced Circle Dies (Crealies), Candied Apple & Worm Lipstick Distress Ink, Glitter Pen, Glitter, Gems, Foam Pads, Funky Foam, Glue, Double Side Tape

If you would like to know how I made a specific card/project or would like the colour list either email me at jsnine.quinn@gmail.com (yes the address is correct). Alternatively leave your request and your email address in the comment box. You MUST leave your email address otherwise I cannot reply to you. Thanks you. xx 

Why not follow us on Facebook - Craft Consortium NetworkCraft Consortium Ltd or our our Instagram page. We'd loved to see you. Thank you so much for dropping by, don't forget to say hi :) 

Please Note 
If you purchase any Craft Consortium products could I politely ask that you give feedback on their facebook page or website and let them know what you think.  Please support our Craft suppliers. Thank you. xxx - I am part of the Craft Consortium's Design Team and I receive their lovely products to play with and share with you; I do not receive any kind of payment for my samples or my participation. Thank you. x

I'll be back tomorrow with another card made using this fabulous collection, so see you then. TTFN!

Challenges entered:

Hugs

x Janine x

Saturday, 4 September 2021

Lili Of The Valley - Festive Reindeer

 Hello everyone

On my blog today I'm sharing my latest card using a new Lili Of The Valley Christmas digi stamp and sentiments, they're are from a selection of images being released in the next week or so. The stamp I have used today is called 'Festive Reindeer', and I teamed it up with the sentiment 'Happy Christmas'. The reindeers are so cute, I really enjoyed colouring up these little guy. I used masking to add a inky background behind them, then teamed them up with a striped background created by me. The links will be added after the launch has taken place. I hope you like it. x (For Sale - £4.50 + P&P - email me for more info).

For your information, here is the link to the LOTV Etsy Store to check out all the digi stampsand the LOTV online store to check out the rest of their goodies.


Here's What I Did
First I added I created the striped background paper for the card. Using a stripe die set I cut lots of pieces of coloured card - white, deep blue, pale blue, pale green, green and silver glitter card. I glued the strips horizontally onto a piece of thin card to create my design, then die cut the rectangle out on a jaunty angle. The striped paper was glued flat onto the card front. 

Using my graphics software I imported the sweet little reindeer image along with the sentiment, then resized them both to fit my project. The image and sentiment were printed directly onto colouring cardstock and die cut into an oval. The image was printed out again onto masking paper, and fussy cut out leaving a large section beneath the reindeers for the snowy area. I covered over the reindeers and tree etc and added distressing inks to the sky (see the list and order below). When the ink was dry I added stars to the sky with a stencil and white ink to add a little more interest. 

When everything was dry I coloured the image using Copic pens and added snowflakes to the sky with a white pen. The finished picture was mounted onto a silver glittery oval, and funky foam was glued to the back. The complete topper was added to the front of the card. To finish the card I added a little glitter to the baubles, snow and star along with a few pearls. 

You can email me at jsnine.quinn@gmail.com if you require more information about how I created this card. 

Here's What I Used 
Digital  Stamp: Festive Reindeer
Digital  Sentiment: Happy Christmas 

Copics: Reindeer - E31, E33, E35, E50, E51, E53, E57, E59 / Tree - YG01, YG03, YG17, YG67, B99 / Ground - B0000, B000 / Baubles, Tinsel & Star - R14, R29, Y15, Y17, Y38

Other: 5" x 7" White Card Blank, Make It Colour Card, Deep Blue, Pale Blue. Pale Green Card, Silver Glitter Card, White Card, Distress Inks (from bottom to top - Squeezed Lemonade, Mustard Seed, Tumbled Glass, Salty Ocean, Faded Jeans, Black Soot), Stars Starry Night Stencil (Memory Box), Noble Double Pierced Rectangle Die (Creative Expressions), Quick Stripes Die (Mama Elephant), Home Sweet Home Oval Die Set (Tonic), Moonlight White Brilliance Ink, Pearls, White Pen, Glitter, Funky Foam, Masking Paper, Glue, Double Sided Tape

Or why not join us on social media at  'We Love Lili Of the Valley' Facebook Group run by the Design Team, the official Lili Of The Valley Facebook page and on Instagram.  We'd loved to see you.

Please Note - I am part of the Lili Of The Valley's Design Team and I receive their lovely digi images to play with and share with you; I do not receive any monetary reimbursement for my samples, advertisements or my participation. I do, what I do for fun and relaxation. Thank you. x

Thank you so much for dropping by, and please don't forget to say hi :)  I'll be back soon with more sneaky peeks of the fabulous new LOTV Spring stamps. TTFN

Challenges entered:

Hugs

x Janine x