Friday, 15 February 2019

Craftsulove Design Team - February Card #1

Morning everyone 💜

I'm back today sharing the first of my February Craftulove Design Team cards with you. This month's cards is highlighting the beautiful new range of stamps and papers by Polkadoodles. I hope you like it. x

All the links to the specific Craftuslove products can be found below, and the link to the general store is here.


Here's What I Did
I trimmed down a piece of patterned paper to cover the front of a 6" x 6" card blank leaving a slim border around the edge. 

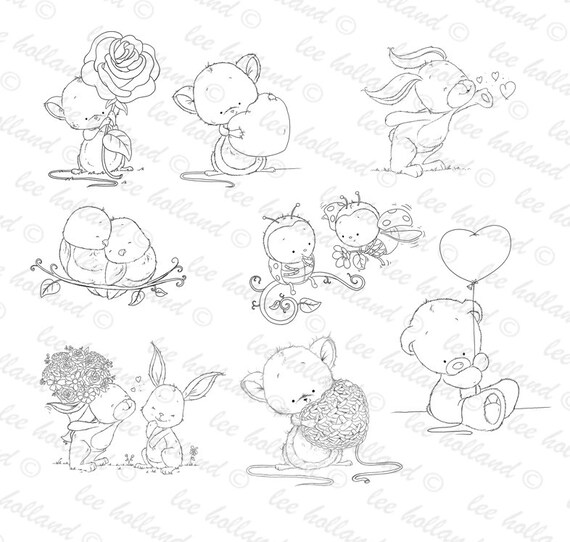
I stamped the image onto colouring card and die cut it into a 4" x 4" square which cut off the leaves at each side. The image was coloured in using Copic pens and added to a die cut square cut from black card. The leaves that were cut off earlier by the die cut were stamped again, coloured using Copic pens and fussy cut out. Two hearts were stamped above the birds using distress ink.

The topper was added to the card front using foam pads and the cut out leaves were attached to the picture so they laid onto the black mat. To completed the card, gold glitter pen was added along with a pearls along the bottom.

Available from Craftsulove
Stamp Set: Heart Sing by Polkadoodles
Paper Pad: Gentle Song by Polkadoodles

Should you purchase any of the above products, please select  'Design Team'  in the 'where have you seen us' drop down so we know we have inspired you! Thank you x

My Own Stash:
6" x 6" Black Card Blank, Black Card, Joanna Sheen Smooth Colouring Card, Copic Pens, Pearls, Gold glitter Pen, Foam Pad, Square Dies (Tattered Lace), Shabby Shutters Distress Ink, Double Sided Tape, Memento Black Ink

Why not, follow us on Facebook, Pinterest, Instagram or on our YouTube Channel we'd loved to see you.

Thank you so much for dropping by, don't forget to say hi :)  I'll be back in a few days with another card using the Polkadoodles stamp set and paper pad.....so see you then. TTFN!

Challenges entered:

Hugs

x Janine x

Thursday, 14 February 2019

More Exciting News!

Big News 💜

Woo hoo! I have some fabulous news, I've been invited to join the Lili Of The Valley's Design Team (LOTV). I have been trying to get onto their Design Teams for many years, in fact since they had their call out in 2015. I'm super excited as I have been a fan of LOTV images forever, but because I've always been on other Design Teams I never had the time to play with them....until now.

Soooo, over the next few days I will be giving you a sneaky peak of some of the new Spring & Easter images that are being launched at the Farnborough show next week (22nd & 23rd February). The rubber stamps will then be available to purchase there, then in the LOTV online store and the digital versions will be in the Etsy store. For my card today I am using a digital stamp.

There is quite a lot of new images to choose so definitely check them out. I will write a post and link to them when they become available. So for now, here is the link to the LOTV online store and the LOTV Etsy Store to check out the rest of the goodies.In my card today


Here's What I Did
Using my graphics software I imported the cute bunny images and the sentiment in the centre, then resized and printed everything directly onto colouring cardstock. I coloured the images with Copic pens and trimmed down the card so that it would cover ¾" of the card front, this was glued into place.  

Next I trimmed down some pink patterned paper to cover the top section of the card at the front and at the back. The front portion of the paper was die cut to create a scalloped border and a score line was added down the centre (so it looked like a tent). The paper was then attached to the card front and then the back. A strip of the same patterned paper was added to the bottom of the card. Glitter was added to the sentiment to make it sparkle.

To complete the card a piece of twine was wrapped around the top section of the card and finished off with a flower button.

Here's What I Used
New Release Digital Stamp: Link will be added at the end of February after launch

Other: 8" x 4" White Card Blank, Glitter, Twine, Button,  Stitched Scalloped Border (Lawn Fawn), Country Meadow Paper Pad (old LOTV pad).

Copics: Bunnies - E31, E33, E35, R30 / Flower, Grass & Leaves - Y02, Y17, YG03, YG17 / Pots - RV00, RV02, RV10, RV14, R32, C1, C5 / Sentiment - RV02, RV10

Or why not join us on social media at  'We Love Lili Of the Valley' Facebook Group run by the Design Team, the official Lili Of The Valley Facebook page and on Instagram.  We'd loved to see you.

Thank you so much for dropping by, and please don't forget to say hi :)  I'll be back in the next day or so with more fabulous images....so I'll see you very soon.

Challenges entered:

Hugs

x Janine x

Friday, 8 February 2019

Whimsy Stamps Inspiration - February New Release

Hi there everyone ðŸ’œ

I'm back today to share one of the new release digital stamps that is also available in rubber cling. The cute bunnie stamp is called 'Think Spring Bunnies' and it's by the lovely Crissy Armstrong.  Both versions of the stamp can be found in Whimsy Stamps online store, the link to the digital one is below.

I have kept my card pretty simple so I could show off the beautiful drawing by Crissy. I coloured the gorgeous little bunnies with pencils on colouring card, and added a few die cut clouds.

All the links to the specific Whimsy products can be found below and the link to the general store is here.


Here's What I Did
Using my graphics software I imported the cute bunnie image, resized it and printed everything onto Neenah Desert Storm card. I coloured the images with both Caran D'ache pencils, starting off with the white pencil over most of the image to help make the other colours pop. Layers of coloured pencil were then lightly added over the top of the white to build up the picture. The coloured in image was trimmed down to fit the card front and a border was added using a black fineliner.

Two clouds were die cut from white card and a pale blue Copic pen was used to draw around the edge to give dimension. To complete the card, the completed topper was glued flat to the card front and the clouds were added using foam pads.

Here's What I Used
Digital Stamp: 'Think Spring Bunnies'

Other: 6½" x 4" White Card Blank, White Card, Desert Storm Neenah Card, Clouds (Diamond Press), Black Fineliner Pen

Caran D'ache Pencils: Grey Bunnies -White, Slate Grey, Payne's Grey / Brown Bunnies - White - Anthraquinoid Pink, Burnt Ochre, Burnt Sienna, Cassel Earth / Butterfly - White, Manganese Violet, Violet / flowers - Lemon Yellow, Golden Bismuth, Yellow, Orange, Cornelian Permanent Red, Purplish Red / Grass & Leaves -  Spring Green, Moss Green

Copics: Sign - E00, E33 / Clouds - B00, 0

Why not, follow us on Facebook group, Pinterest, Instagram or on our Blog we'd loved to see you.

Thank you so much for dropping by, don't forget to say hi :)  I'll be back on Wednesday 16th January with more fabulous Whimsy stamps and papers....so see you then. TTFN!

Challenges entered:

Hugs

x Janine x

Sunday, 3 February 2019

Lee Holland Illustrations Design Team - February

Big News 💜

Woo hoo! I have some great news, I've been invited to join Lee Holland Illustrations brand new Design Team. Lee is an incredibly talented artist who creates the most wonderful digital stamps as well as illustrates children's books and printable art, and if you haven't seen any of his work please do.
I have the pleasure of sharing one of the images from one of Lee's new digital bundles called 'Love Bundle'. The bundle contains 8 of the sweetest digital stamps, and are all perfect for Valentines, birthdays and anniversaries. The bundle is available in Lee's Etsy store and cost £8 + VAT.
 

image 0

To check out everything else in Lee's Etsy store click here Lee Holland Art.


Here's What I Did
Firstly I trimmed down some pink textured card and rounded off the corners. The card was attached to the front of a 5" x 7" white card blank leaving a slim border around the edge.

Using my graphics software I imported the cute bunny images, then resized and printed them directly onto colouring cardstock. I coloured the images with Copic pens and die cut it into a rectangle. The word 'love' was die cut into the card. 

The image was printed out again onto copier paper and fussy cut out, then attached to the images using temporary tape runner to create a mask. Using a cloud stencil and distressing ink clouds were added to the scene. When the ink was dry the mask was removed.

The coloured image was attached to the card front, and the die cut 'love' letters were re-added to their  spaces using cut down foam pads. To finish off the card, a tiny die cut heart was glued to the 'o' and glitter was added to the hearts and flower centres.

Here's What I Used
New Release Digital Stamp: 'Love Bundle'

Other: 5" x 7" White Card Blank, Joanna Sheen Smooth Card, Pink Textured Card, Glitter, Noble-Double Pierced Background Rectangle Die (Creative Expressions), Fashion Dies (Diamond Press), Cloud Stencil (MFT), Tumbled Glass Distressing Ink, Black Fineliner, Heart Punch, Corner Rounder Punch

Copics: Bunnies - E02, E31, E33, E35, E37, E43 / Flower - R20, R22, R32, Y00, Y06, Y35, Y38, V01, V12, V15 / Grass & Leaves - YG03, YG17 / Bouquet Wrapping - YR000, YR00, E95

You can find Lee's Etsy shop here. Or why not, follow us on Facebook group and Instagram we'd loved to see you.

Thank you so much for dropping by, and please don't forget to say hi :)  I'll be back very soon with more fabulous images....so I'll see you very soon.

Challenges entered:

Hugs

x Janine x

Saturday, 2 February 2019

Some News For You

Afternoon everyone 💜

Today I'm sharing some special new with you. I was lucky enough to be invited to contribute in February's issue of 'Making Cards' magazine. I have 3 masculine cards featured which I made with die cut stars.  The 3 cards are easily achievable by just using square and star dies along with different coloured card. Definitely check out the magazine and it's freebies....there's more information below. x


A little about the magazine...
The February edition of Making Cards & Papercraft is jam-packed with freebies! You’re sure to be swooning over the gorgeous Sweet Samantha stamp set with it’s beautiful illustrations and motivational quotes! There’s papers to coordinate too! The second set of craft papers: Valentine Unicorns are soooo sweet also! There’s no less than 12 toppers to use! There are two further collections for you to get your hands on too; Snowboarding Dude! - great for making cards for boys and men with it’s cool blues and snowy scenes, and Dreamcatchers - pretty collection in muted pastels. Not forgetting the fantastic free digi download as part of the ‘Colour the stars’ feature going through the zodiac signs!
 
Elsewhere in the magazine there are no less than 4 new contributors, each bringing with them new styles and skills, makes for men and Mother’s Day, a giveaways, interviews and so much more! Pick up in selected supermarkets and craft stores or order online at www.makingcardsmagazine.com for worldwide delivery with free UK p&p and digital editions!

As well as projects you’ll find interviews, giveaways, shopping and more!

Enjoy!
 
x Janine x

Friday, 1 February 2019

Whimsy Stamps - February 2019 New Releases

Hi everyone ðŸ’œ

Wow it's February 1st....so ok, where did January go? I feel I blinked and totally missed January. Lol

Anyhow, it's the beginning of a new month and that means new release week at Whimsy Stamps. So today I'm sharing one of the rubber stamp images that is now available in a digital format, the sweet girl stamp is called 'Amy' and it's by Sylvia Zet. I coloured her with Copic pens and added glitter to her heart balloon along with a few die cut flowers and leaves. x

All the links to the specific Whimsy products can be found below and the link to the general store is here.


Here's What I Did
Firstly I trimmed down a piece of patterned paper and attached it to the front of a 6" x 6" white card blank, leaving a slim white border around the edge.

Using my graphics software I imported the sweet girl image, then resized and printed her directly onto Neenah card. I die cut the image into a circle, cutting off the top section of the balloon and coloured it in with Copic pens.  The coloured image was attached to a die cut scalloped circle cut from teal card.  The topper was then added to the card front using foam pads. The balloon section of the image was printed again, coloured with Copic pens and then fussy cut out. Glitter was added to the balloon, then glued into place over the top of the one on the topper so that it peeks out of the circle.

To complete the card, flowers and leaves were die cut and punched from pink and green card and added to the card front along with a few tiny pearls.

Here's What I Used
New Release Digital Stamp: 'Amy'

Other: 6" x 6" White Card Blank, Neenah Card, Teal Card, Different Pink Card, Green Card, Glitter, Pearls, Scalloped Circle Die (Crealies), Double Dot Circle (Crealies), Small & Medium Multi Rose Dies (Britannia), Camellia Complete Petal (Creative Expressions), Embellishment Dies (Tattered Lace), Foam Pads, White Pen, up, Up, & Away Paper Pad (LOTV), Leaf Punch (Martha Stewart)

Copics: Skin - E000, E00, E02, E11 / Hair - E35, E37, E50, E53 / Fur Trim - W1, W2 / Top, Shorts & Flowers - BG10, BG13, BG34, BG49 / Gilet, Tights, Boots, Vase & Flowers - RV02, RV10, RV23, R34, W2 / Leaves - YG03, YG17

Why not, follow us on Facebook group, Pinterest, Instagram or on our Blog we'd loved to see you.

Thank you so much for dropping by, don't forget to say hi :)  I'll be back on February 8th with another new digi stamp from the release....so see you then. TTFN!

Challenges entered:

Hugs

x Janine x

Thursday, 24 January 2019

Whimsy Stamps Inspiration - January Week 4

Hi there everyone ðŸ’œ

Today I'm sharing another of our January releases, this time it's one of our fabulous digital papers. I've used the same paper in both cards to show how it can be used, and it belongs to a collection called 'Hearts A Flutter'. The collection contains 6 different 6" x 6" papers, all with a heart theme.

All the links to the specific Whimsy products can be found below and the link to the general store is here.


Here's What I Did
Using my graphics software I imported the digital papers and printed it directly onto some good quality smooth printer paper. On both cards I die cut the paper to size and give it a scalloped border. The paper was attached to the card front.

Card 1 - I die cut 3 hearts in different sizes using pink and red card, and then vellum. The hearts were laid flat over each other apart from the smallest which was raised up using foam pads. A computer generated sentiment was added to the card from along with a few gems, pearls and sequins.

Card 2 - a square was cut from white card and the centre was cut out using a slightly smaller square die to create a frame, this was added to the card front. Using a 'love' die from my own stash I cut it out from white card 4 times. The die cuts were gluing on top of each other to create a stack and added to the frame.  The word 'love' was cut again from red card, and the hearts that were cut out were glued inside the heart aperture on the card front. To complete the card, hearts that were the waste from the white 'love' die cut were added to the card front.

Here's What I Used
New Release Digital Paper: Hearts A Flutter'

Other: 6" x 6" White Scalloped Card Blank,  6" x 6" White Wavy Edge Card Blank, Red Card, Deep Red Card, Pink Card, White Card, Vellum, Square Layering Die (Tonic), Love Die (The Works), Heart Dies (Sizzix), Gems, Sequins, Mini Pearls, Mini Banner (Lawn Fawn)

Why not, follow us on Facebook group, Pinterest, Instagram or on our Blog we'd loved to see you.

Thank you so much for dropping by, don't forget to say hi :)  I'll be back on 1st February with a new release Whimsy digital stamp....so see you then. TTFN!

Challenges entered:

Hugs

x Janine x

Wednesday, 16 January 2019

Whimsy Stamps Inspiration - January Week 3

Hi there everyone ðŸ’œ

Today I'd love to share another of the new release digital stamps which is also available in rubber cling. The cute boy angel digi stamp is called 'Angel Cody' and he is by Sylvia Zet.  Both versions of the stamp can be found in Whimsy Stamps online store; I have supplied the links to both in the shopping list below.

I coloured the cute little boys angel with pencils on brown colouring card, and added glitter to their wings and the little stars. Please note, that the sentiment was computer generated, as were the extra stars and clouds. All the links to the specific Whimsy products can be found below and the link to the general store is here.


Here's What I Did
Using my graphics software I imported 2 of the cute little angel then resized both of them and flipped one of them. I created a little scene with the 2 angels along with a few of my own stars and clouds; lastly I added my own computer generated sentiment. The completed scene was printed directly onto Neenah Desert Storm card, and coloured with both Prismacolour and Caran D'ache pencils.

Before adding any colour pencil work to the printed out design, I lightly added white pencil over most of the images, taking care not to go over the black lines. The reason for the white pencil is because it helps to made the final colours pop. Layers of coloured pencil were then lightly added over the top of the white building up areas of light and dark areas on the image. The completed scene  was then die cut into a rectangle.

A rectangle was cut from blue card and added to the card front, and the finished scene was attached directly on top.  To complete the card glitter was added to the stars and angel's wings.

Here's What I Used
New Release Digital Stamp: 'Angel Cody'
Rubber Cling Stamp - Angel Cody

Other: 5" x 7" White Card Blank, Blue Card, Desert Storm Neenah Card, Glitter, Noble Double Pierced Rectangle Die (Creative Expressions)

Prismacolor (P) and Caran D'ache (CD): Skin - White (CD), Light Peach (P), Peach (P), Blush Pink (P), Pink (P), Carmine Red (P), Sienna Brown (P) / Hair - White (CD), Lemon Yellow (CD), Golden Bismuth Yellow (CD), Orange (CD), Burnt Ochre (CD), Burnt Sienna (CD) /Robe -White (CD), Light Cobalt Blue (CD), Light Cerulean Blue (P), Genuine Cobalt Blue (CD), Phthalocyanine Blue (CD), Prussian Blue (CD), Black (CD) / Ladybird - White (CD), Anthraquinoid Pink (CD), Scarlet (CD) / Feathers - White (CD), Light Cobalt Blue (CD), Genuine Cobalt Blue (CD) / Cloud & Wings - White (CD), Light Cobalt Blue (CD), Light Cerulean Blue (P) / Stars - White (CD), Lemon Yellow (CD), Golden Bismuth Yellow (CD), Orange (CD)

Why not, follow us on Facebook group, Pinterest, Instagram or on our Blog we'd loved to see you.

Thank you so much for dropping by, don't forget to say hi :)  I'll be back on Wednesday 24th January with more fabulous Whimsy stamps and papers....so see you then. TTFN!

Challenges entered:

Hugs

x Janine x

Wednesday, 9 January 2019

Whimsy Stamps Inspiration - January Week 2

Hi there everyone ðŸ’œ

I'm back today to share one of the new release digital stamps that is also available in rubber cling. The cute angel stamp is called 'Angie' and she is by Sylvia Zet.  Both versions of the stamp can be found in Whimsy Stamps online store; I have supplied the links to both in the shopping list below.

I coloured the sweet angel with pencils on colouring card, and added glitter to her wings and the stars. Please note, that the sentiment was computer generated. All the links to the specific Whimsy products can be found below and the link to the general store is here.


Here's What I Did
Using my graphics software I imported the sweet angel, resized her and added my own sentiment then printed everything onto Neenah Desert Storm card. I coloured the images with both Prismacolour and Caran D'ache pencils. Before adding any colour I added white pencil over most of the image as this helps to made the colours pop. Layers of coloured pencil were lightly added over the top of the white to build up the light and dark areas of the image. The coloured in image was cut into a square. Glitter was added to the angels wings and stars

A scalloped square was cut from pink card, and the centre was cut out using a square die to create a frame. Pink pencil was added to the inside and outside edge of the frame. The frame was glued over the top of the coloured in topper, and added to the card front using foam pads. To complete the card die cut stars were added to the card front.

Here's What I Used
New Release Digital Stamp: Angie
Rubber Cling Stamp - Angie

Other: 6" x 6" White Scalloped Card Blank, Pink Textured Card, White Glitter Card, Desert Storm Neenah Card, Starry Skies Die (Lawn Fawn), Scallop Square Die (Spellbinders), Glitter, Essential Stars (Die'sire)

Prismacolor (P) and Caran D'ache (CD): Skin - White (CD), Light Peach (P), Peach (P), Blush Pink (P), Pink (P), Carmine Red (P), Sienna Brown (P) / Hair - White (CD), Lemon Yellow (CD), Golden Bismuth Yellow (CD), Orange (CD), Burnt Ochre (CD) / Dress, Bow, Feathers, Ladybird - White (CD), Blush Pink (P)  / Cloud & Wings - White (CD), Light Cobalt Blue (CD), Light Cerulean Blue (P) / Stars - White (CD), Lemon Yellow (CD), Golden Bismuth Yellow (CD), Orange (CD)

Why not, follow us on Facebook group, Pinterest, Instagram or on our Blog we'd loved to see you.

Thank you so much for dropping by, don't forget to say hi :)  I'll be back on Wednesday 16th January with more fabulous Whimsy stamps and papers....so see you then. TTFN!

Challenges entered:

Hugs

x Janine x

Wednesday, 2 January 2019

Whimsy Stamps Inspiration - January 2019 New Release

Happy New Year guys 💜

I hope you all had a fabulous New Year, I know I did. :)

Today, it's my turn to share one of the brilliant new release digital stamps and papers from Whimsy Stamps. The sweet fairy stamp is called 'Spread Love' and the digital paper is called 'Hearts A Flutter' perfect for Valentine's Day or an anniversary. I coloured her with Copics and glitter up her wings and hearts. Nb. The sentiment is from my own stash. x

All the links to the specific Whimsy products can be found below and the link to the general store is here.


Here's What I Did
Firstly I printed the digital paper onto a sheet of smooth white paper, and after trimming it down it was attached to the front of a 6" x 6" white card blank.

Using my graphics software I imported the pretty fairy image, then resized and printed her directly onto Neenah card. I coloured the images with Copic pens and die cut it into a circle. Glitter was added to the fairy's wings and her scattered hearts. A sentiment (from my own stash) was stamped beneath the fairy using black ink.

The coloured image was attached to a fancy die cut frame cut from deep pink card. The topper was then added to the card front using foam pads. To complete the card pink gems were added to the top and bottom of the card.

Here's What I Used
New Release Digital Stamp: Spread Love
New Release Digital Paper: Hearts A Flutter

Other: 6" x 6" White Card Blank, Neenah Card, Pink Card, Glitter, Pink Gems, Fancy Frame Die LR0112 (Marianne Designs), Double Dot Circle (Crealies), Foam Pads,  Whatnot Sentiments 3 (YNS)

Copics: Skin - E000, E00, E02, E11 / Hair - YR0000, YR000, YR00, E13, E99, E37 / Dress - RV02, RV04, RV10, RV13, RV14 / Wings - RB10, BG11

Why not, follow us on Facebook group, Pinterest, Instagram or on our Blog we'd loved to see you.

Thank you so much for dropping by, don't forget to say hi :)  I'll be back on Thursday 3rd May with another new digi stamp from the release....so see you then. TTFN!

Challenges entered:
Simon Says Stamp - https://www.simonsaysstampblog.com/wednesdaychallenge/

Hugs

x Janine x