Thursday 30 August 2018

Craftsulove Design Team - August Card & Tutorial

Hi guys💙

I'm back with another card and tutorial using products available in the Craftsulove online store.

This month I am highlighting a beautiful Christmas stamp by Woodware, a paper pad from Studiolight which has the most stunning papers inside, and a gold shimmer pen from Tonic's Nuvo range (find the links below).


You Will Need
(Products available from Craftsulove):
Framed Poinsettia’ WoodWare Stamp Set
‘Woodland Winter’ Paper Pad by Studiolight
 Gold Midas Touch Nuvo Aqua Shimmer Pen

 From My Own Stash:
6” x 6” Card
Watercolour Card
‘Red Brick’ Distressing Ink
‘Peeled Paint’ Distressing Ink
‘Fossilized Amber’ Distressing Ink
Gold Embossing Powder
Versamark Ink
Gold Mirror Card
Double Sided Tape
Anti-static Bag
Heat Tool
Foam Pads
Gems

To Make The Card
1. Using one of the patterned papers from the pad, stamp and heat emboss the ‘Season’s Greeting’ sentiment down the left hand the side using gold embossing powder. Adhere this to the front of a
6” x 6” white card blank.
Tip
 Before heat embossing your image and sentiment dust the surface of the paper/card you are using with the anti-static bag, this will remove any finger prints and grease residue.

2. Stamp and heat emboss the complete image onto another piece of patterned paper from the pad using gold embossing powder. Trim the stamped image down and mat onto gold mirror card.
3. Stamp and heat emboss a further 4 images onto watercolour card with gold embossing powder. Next colour segments of the images as mentioned below using the following technique.

Technique
Add distressing ink to a non-porous surface eg glass mat, stamping block, plate etc. Pick up the each colour using the gold shimmer pen, and paint as you would do with a paint brush. This will make the painted areas shimmer.

Where To Colour


4. On the 1st image fully colour the bottom leaf and around the edge of the top leaf using green distressing ink and the gold pen, Then add red distressing ink around the edges of the poinsettia again using the pen. Cut out the poinsettia and both leaves.

5. On the 2nd embossed image fully colour the top leaf with green distressing ink, and again add red distressing ink around the edges of the poinsettia using the pen. Cut out the poinsettia and the leaf.

6. On the 3rd embossed image only colour the poinsettia with red distressing ink using the pen, and cut out.

7. On the 4th image only colour the small centre section of the poinsettia with red distressing ink and the berries with the yellow ink all using the pen, and cut out.

8. Layer up the poinsettia and leaves using foam pads, then line everything up with the image on the topper, and add to the card front using foam pads.
9. To complete the card add gems to the berries and the 3 stars.
 
Why not, follow us on Facebook, Pinterest, Instagram or on our YouTube Channel we'd loved to see you.

Thank you so much for dropping by, don't forget to say hi :) I'll be back next month with another new Craftsulove project/tutorial....so see you then. TTFN!

Challenges entered:

Hugs

x Janine x

Wednesday 15 August 2018

Craftsulove - August Card #1

Morning everyone 💜

Today I'm sharing my August Craftulove Design Team card with you.

So for this card I'm using the ever so cute Owl stamp set 'Owl My Love' by My Favorite Things (MFT) and some of the BoBunny Early Bird 'Notes' patterned paper in the background. I stamped the characters onto watercolour card and coloured them with watercolour pens.

All the links to the specific Craftuslove products can be found below, and the link to the general store is here.


Here's What I Did
I covered the card front with a trimmed down piece of the 'Notes' paper which I edged with black distressing ink, leaving a border around the edge.

The owls, branch (which I extended) and the sentiment were stamped onto watercolour card and cut out. A small circle was die cut from white watercolour card and lightly coloured with blue and yellow watercolour pen, to make it moon like. I die cut a large black circle and trimmed off a little from one side. All the pieces were glued onto the black circle and any excess was trimmed off.  The circle topper was added to the card front using foam pads.

To complete the card, I added 2 circles punched from black card to the right hand side of the card..

Available from Craftsulove
Stanps: 'Owl My Love' by My Favorite Things (MFT)
12" Paper: 'Notes' from the Early Bird Collection by BoBunny

My Own Stash:
5½" x 5½" Black Card Blank, Watercolour Card, Circle Die, Black Card, Foam Pads, Distressing Inks (Black Soot), Zig Clean Color Pens. Circle Punch, Verasafine Black Ink, Foam Pads, Glue

Why not, follow us on Facebook, Pinterest, Instagram or on our YouTube Channel we'd loved to see you.

Thank you so much for dropping by, don't forget to say hi :)  I'll be back on the 30th with a new project/tutorial....so see you then. TTFN!

Challenges entered:

Hugs

x Janine x

Tuesday 14 August 2018

Whimsy Stamps - August Week 3

Hi everyone 💜

Today I'm sharing one of the beautiful red rubber stamps by Deb Davis, it's from her collection of stained glass images and available from the Whimsy Stamps store. This stamp is called  'Stained Glass Flamingos'. It's a beautiful and unusual stamp and fun to colour.

Right, I'm off on my hollibobs again....this time cruising around Norway's Fjords. see you in a week's time :)

All the links to the specific Whimsy products can be found below and the link to the general store is here.


Here's What I Did
The image was stamped onto Kraft card and cut down to fit the card front. The image was coloured using pencils - I added a layer of white pencil before I adding my colour. The eye were coloured using a white and black pen. To completed the card, the topper was added to a cut to size black card blank.

Here's What I Used
New Release Rubber Stamp:  'Stained Glass Flamingos' by Deb Davis

Other: 6" x 5½" Black Card Blank, Kraft Card, Caran D'ache Luminance Pencils (001, 030, 070, 171, 220, 240, 470, 571, 661, 662), White Pen, Black Fineliner

Our new challenge #108 started on the 15th July, so why not come and join us. There a  fabulous $15 prize to win and the theme as always is #Anything Goes'. Here is the link for you, so come on what are you waiting for!

Why not, follow us on Facebook group, Pinterest, Instagram or on our Blog we'd loved to see you.

Thank you so much for dropping by, don't forget to say hi :)  I'll be back on Thursday 3rd May with another new digi stamp from the release....so see you then. TTFN!

Challenges entered:
Hugs x

Monday 6 August 2018

Whimsy Stamps - August Week 2

Hi everyone 💜

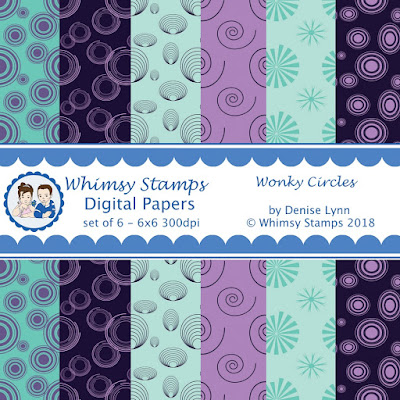
Today I'm sharing some of the fabulous digital papers from Whimsy Stamps. This collection is new for this month and it was designed by Denise Lynn (the owner of Whimsy Stamps). The paper collection is called  'Wonky Circles' - I love the name, don't you.


.
https://whimsystamps.com/collections/august-2018-digital/products/wonky-circles-papers-digital-papers?aff=28

All the links to the specific Whimsy products can be found below and the link to the general store is here.

Here's What I Did
The digital papers were resized to suit my project, I used Microsoft PowerPoint for my graphics work these days. The lilac patterned paper was printed directly onto smooth paper and added to the 6" x 6" card front, the aqua paper was printed onto white light weight cardstock and added to the centre of the card front using foam pads.
 
To create the topper I die cut a 'hello' sentiment from lilac card and adhered it to a die cut white circle, which was added to a pearly edged lilac mat. The topper was added to the front of the card using foam pads.
 
To complete the card I add a few butterflies in complimentary colours, along with a few lilac pearls and gems.

Here's What I Used
New Release Digital Paper: 'Wonky Circles'

Other: 6" x 6" Scalloped White Card Blank, Aqua Card, Lilac Card, White Card, Circle Dies (Tattered Lace), Pearl Circle Dies (Tattered Lace), 'Hello' Die (Crafter's Companion), 'Butterflies' Dies (Diamond Press), Mini Butterfly Punch, Lilac Pearls, Gems, Foam Pads, PowerPoint; Printer

Our new challenge #108 started on the 15th July, so why not come and join us. There a  fabulous $15 prize to win and the theme as always is #Anything Goes'. Here is the link for you, so come on what are you waiting for!

Why not, follow us on Facebook group, Pinterest, Instagram or on our Blog we'd loved to see you.

Thank you so much for dropping by, don't forget to say hi :)  I'll be back on Thursday 3rd May with another new digi stamp from the release....so see you then. TTFN!

Challenges entered:
Hugs x

Friday 3 August 2018

Whimsy Stamps - August New release #2

Hi everyone 💜

It's another Whimsy new release day.  So for today's new digital image I'm sharing 'King Lion' by the lovely Crissy Armstrong.  Don't you just think he is the cutest lion ever....I just want to hug him. As you can tell I've been practicing my flicking technique. :)

All the links to the specific Whimsy products can be found below and the link to the general store is here.


Here's What I Did
First I stamped a sheet of Kraft card with black paw prints, then used it to mat a 6" x 6" scalloped card blank leaving a slim border around the edge.  Using my graphics software (I used MS PowerPoint) I imported my digital stamp and resized it, then printed it directly onto colouring card, coloured using Copic pens and fussy cut out.

A piece of white card was die cut using a rounded rectangle and matted onto a slightly larger rectangle cut from black card.  The word 'Roar' was die cut from black card and funky foam, the foam was glued to the back of the letters and added to the topper. The cut out lion was added just above the letters using foam pads and the finished topper was added to the card front using foam pads.

To the complete the card, glitter was added to the jewels in the crown and yellow enamel dots added to the top left edge.

Here's What I Used
New Release Digital Stamp: 'King Lion'

Other: 6" x 6" Scalloped White Card Blank, Black Card, Kraft Card, Copic Pens, Rounded Corner Rectangle Die (Tattered Lace), Neenah Colouring Card, White Card, Enamel Dots, Glitter, Foam Pads, PowerPoint; Printer, Funky Foam,  Paw Print Stamp (from my stash)

Copics:
Fur - E31, E33, E35, E37 / Nose - C7, 100 / Crown - Y06, Y15, Y17, G03, YG17, R17, R29

Our new challenge #108 started on the 15th July, so why not come and join us. There a  fabulous $15 prize to win and the theme as always is #Anything Goes'. Here is the link for you, so come on what are you waiting for!

Why not, follow us on Facebook group, Pinterest, Instagram or on our Blog we'd loved to see you.

Thank you so much for dropping by, don't forget to say hi :)  I'll be back on Thursday 3rd May with another new digi stamp from the release....so see you then. TTFN!

Challenges entered:

Hugs

x Janine x

Thursday 2 August 2018

Hunkydory's For The Love Of Stamps - August Launch

Hi everyone

Today I'm sharing 10 of my Design Team samples with you that I've just made for the August (Christmas) release 'For The Love Of Stamps' By Hunkydory for  Create & Craft TV. The full stamp and mask collection launched today on Create & Craft TV, so check them out. These are my last projects for FTLOS as I've just stepped down from the Design Team. I wish all my teamies continued success and lots of hugs as they are fab group of girlies. Mwah! 

So if you want to know anything about the cards I've created please either email me or leave me a comment plus your email address and I'll send you all the details. :) However I will still list the products use.


I Used:
August Launch Stamps & Masks -'The Nativity’, ‘Furry & Bright’, ‘Nutcracker Kisses’, ‘Santa Claus’, ‘The Sound Of Christmas’, ‘O Christmas Tree’, ‘Sparkling Snowflakes’, ‘Christmas Rose Lantern’, ‘Carolling Cuties’, ‘Silly Snowman’ (only available at Create & Craft atm)
Cardstock, Paper & Pads - Adorable Scorable - Matt-tastic, Hunkydory Card Blanks, Hunkydory Kraft Card, Ink Me Card, Colour Me CardChristmas Perfect Paper Pads, A4 Masking Sheets, Hunkydory Prism Inks, Hunkdory Pearlescent Powders, FTLOS Magazine Freebie Paper

Some of the above products can also be purchased on the Create & Craft's website.

Other:
Copic Pens, Strong White Card, Colouring card, Gold Mirror Card, Green Mirror Card, Silver Mirror Card, Red Mirror Card, Enamel Dots, Crystal Glitter, Circle Dies (Tattered Lace), Double Dot Circle die (Crealies), Circle & Scalloped Circle Dies (Crealies), Oval & Scalloped Oval Dies (Tonic), White Embossing Powder, Gems, Black Memento Ink, Gold Glitter Pen, Watercolour Card, Black Versafine Ink, Red Stars, Gold Embossing Powder, Pearl Circle Die (Tattered Lace), Foam Pads, Distressing Ink, Pale Yellow Vellum, White Pen, Sparkly Enamel Dot, White Funky Foam, Acetate, Sequins

Hope you like them.

Big hugs

x Janine x

Wednesday 1 August 2018

Whimsy Stamps - August New Release #1

Hi there peeps ðŸ’œ

Well it's the 1st August and a new release day at Whimsy Stamps. I'm going to be sharing 2 new digital stamps, one today and one on Friday.  So today's image I'm using 'Autumn Harvest Ride' by the lovely Crissy Armstrong.  It's this a beautiful stamps, and printed it directly onto some digital patterned paper, and then coloured it up using Copic pens..

All the links to the specific Whimsy products can be found below and the link to the general store is here.


Here's What I Did
I totally covered an 5" x 7" top fold card with some checked patterned paper.  Using my graphics software (I used MS PowerPoint) I imported my digital paper and resized it, then added the horse straight on top and printed it straight onto colouring card and trimmed to size.

The digital image was then coloured using Copic pens, a gold glitter pen was used on the tassels and leaves. The completed topper was added to a die cut frame cut from aqua card, to tie in with the image.  The frame was attached to the card from using foam pads.

To complete my card I used complimentary enamels dots and gems.

Here's What I Used
New Release Digital Stamp: Autumn Harvest Ride
Digital Paper: Floral Beauty

Other: 5" x 6" White Card Blank, Aqua Card, Copic Pens, Rectangle Die (Tattered Lace), Doily Edge Rectangle Die (Tattered Lace), Neenah Colouring Card, Enamel Dots, Gems, Gold & Bronze Glitter Pen, PowerPoint; Printer, Funky Foam,  Patterned Paper (from my stash)

Copics: Horse - E18, E31, E33, E37, E99 / Harness - R14, R17, R27, Y15, Y38 / Pole - YG01, YG03, B00, BO5 / Pumpkins - YR04, YR15, R14, YG17, YG03 / Leaves - R17, Y15, YR15 / Apple - R14, R27

Our new challenge #108 started on the 15th July, so why not come and join us. There a  fabulous $15 prize to win and the theme as always is #Anything Goes'. Here is the link for you, so come on what are you waiting for!

Why not, follow us on Facebook group, Pinterest, Instagram or on our Blog we'd loved to see you.

Thank you so much for dropping by, don't forget to say hi :)  I'll be back on Thursday 3rd May with another new digi stamp from the release....so see you then. TTFN!

Challenges entered:

Hugs

x Janine x